How to Hang a Canvas Painting: Step-by-Step Guide
Master the art of hanging canvas paintings! Easy step-by-step instructions for perfect wall placement, tools needed, and pro tips included.

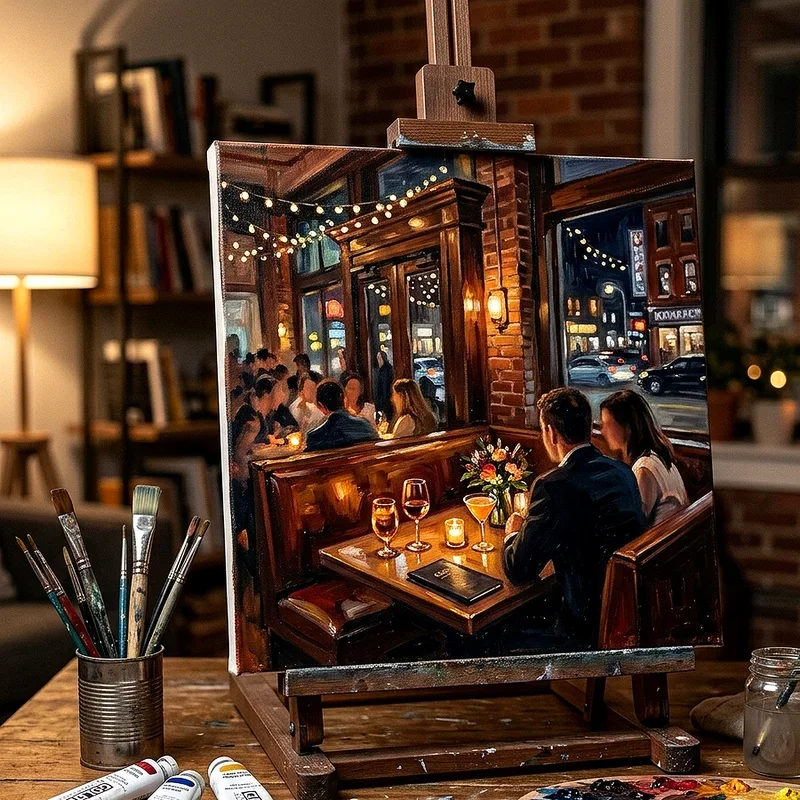
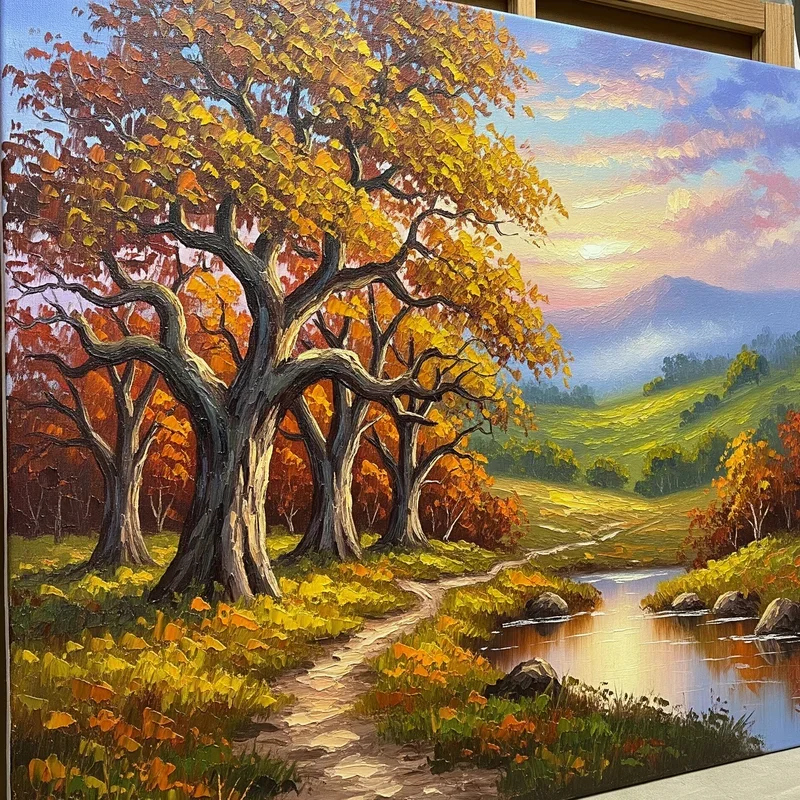
Well, you've finally done it! You've got that gorgeous canvas painting sitting there, just waiting to jazz up your walls. But hang on a minute, how exactly do you get it from floor to wall without turning your living room into a disaster zone? Don't worry, we've all been there, staring at a blank wall with a hammer in one hand and confusion in the other. This How to Hang a Canvas Painting: Step-by-Step Guide will walk you through everything you need to know, from picking the perfect spot to that satisfying moment when you step back and admire your handiwork. Whether you're a first-timer or just need a refresher, getting your canvas up properly isn't rocket science, though it does take a bit of know-how to avoid those dreaded crooked frames and unnecessary holes in your drywall.
Why Proper Canvas Hanging Matters More Than You Think
Let's face it, nothing screams "amateur hour" quite like a crooked painting or worse, one that comes crashing down in the middle of the night. Hanging your canvas properly isn't just about aesthetics, though that's certainly important. It's about protecting your investment, preserving your walls, and creating that perfect ambiance you're after. When done right, a well-hung canvas becomes the focal point that ties your whole room together. Plus, knowing you've done it correctly gives you that little boost of confidence every DIY enthusiast craves.
Essential Tools You'll Need Before Starting
Before diving headfirst into this project, let's gather our arsenal. Trust me, having everything ready beats running to the hardware store halfway through with paint on your hands.
Here's what you'll need: • A measuring tape (the longer, the better) • A pencil for marking spots • A level (your eyes can deceive you) • Wall anchors or picture hooks • A hammer or drill • Screwdriver • Stud finder (optional but super helpful) • Painter's tape (for planning placement)
Oh, and grab a friend if you can! Four hands make light work, especially with larger canvases.
Choosing the Perfect Wall Location
Picking where to hang your canvas is like choosing the right outfit, it can make or break the whole look. Generally speaking, eye level is your best friend here, which typically means the center of your painting should sit about 57 to 60 inches from the floor. But hey, rules are meant to be bent sometimes! If you're hanging it above a couch, aim for about 6 to 8 inches above the backrest. Walking around your room, you'll want to consider natural light sources too. Direct sunlight can fade your artwork faster than you can say "UV damage," so keep that beauty out of harsh rays.
Understanding Different Canvas Types and Weights
Not all canvases are created equal, and boy, does that matter when you're figuring out how to hang them! You've got your lightweight prints on stretched canvas, which might only need a simple nail. Then there are those hefty, gallery-wrapped monsters that'll need serious support. Checking the back of your canvas, you'll usually find either a wire system, D-rings, or sawtooth hangers already installed. Each one needs a slightly different approach, which we'll get into shortly.
The How to Hang a Canvas Painting: Step-by-Step Guide Process
Step 1: Measure Twice, Hang Once
Starting with measurements might seem tedious, but it'll save you from a wall that looks like Swiss cheese. Measure the width of your canvas and find its center point. Then, measure your wall space to find where you want that center to land. Mark it lightly with a pencil, nobody wants permanent marks peeking out from behind their masterpiece!
Step 2: Check for Studs and Wall Type
Here's where that stud finder comes in handy! Running it along the wall, you're looking for those vertical supports behind the drywall. If you hit a stud, jackpot! You can screw directly into it for maximum support. No stud? No problem! That's what wall anchors are for. Different walls need different approaches though. Drywall's pretty forgiving, but if you're dealing with plaster or concrete, you'll need special anchors.
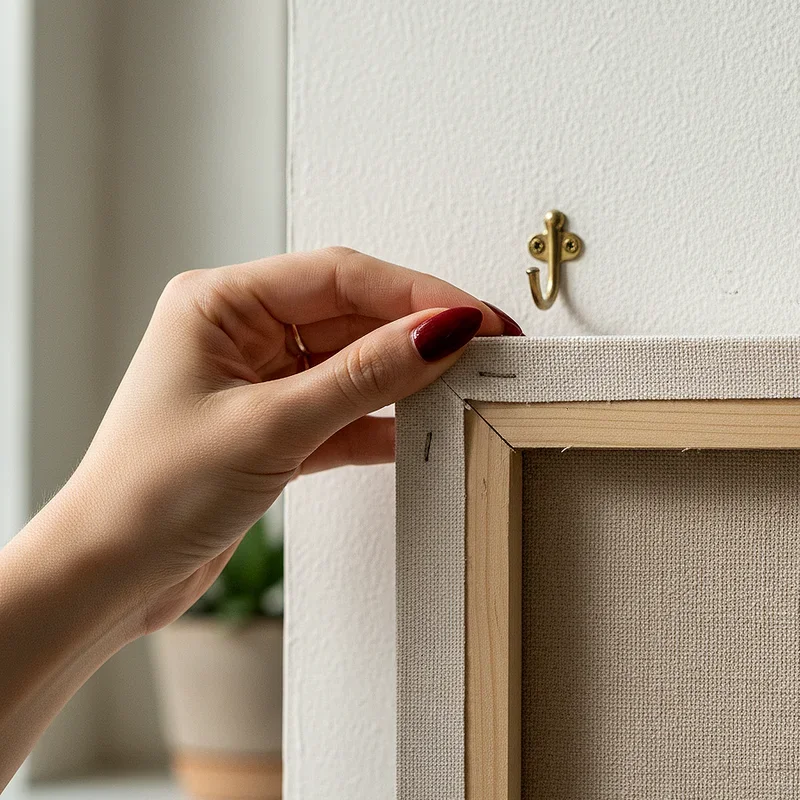
Step 3: Mark Your Hanging Points
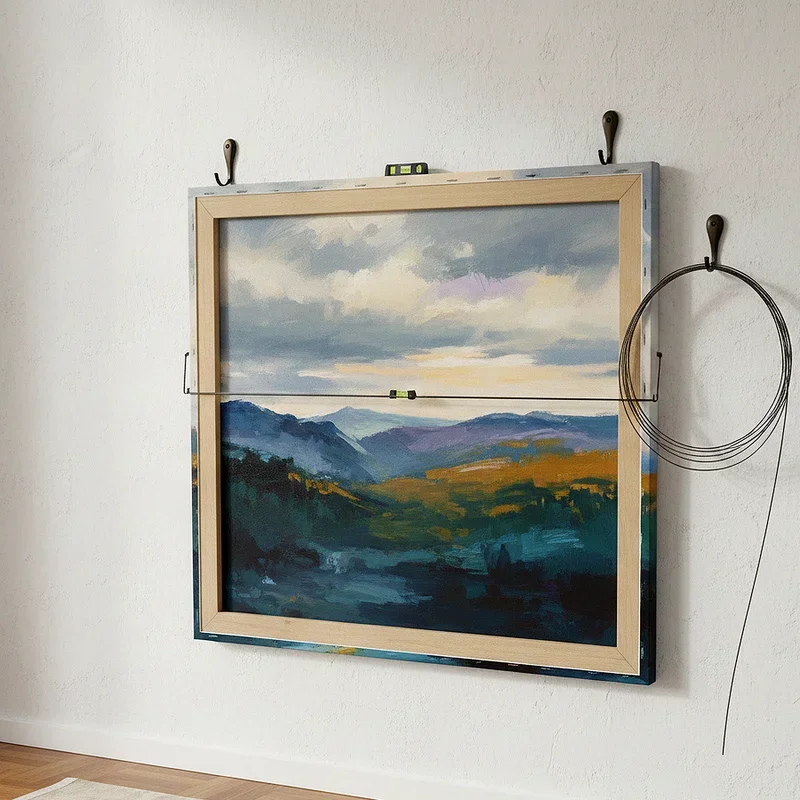
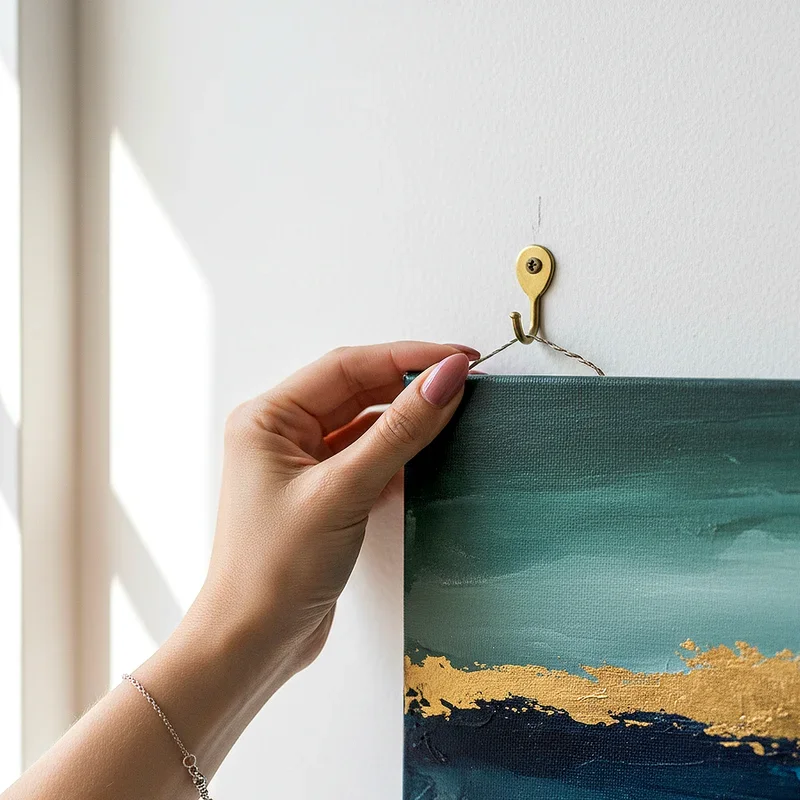
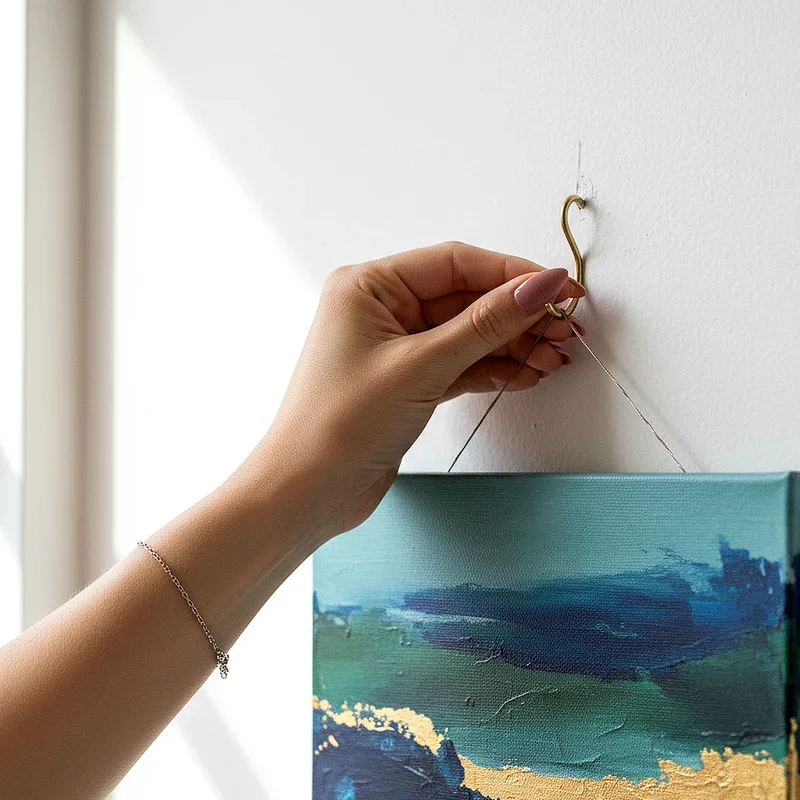
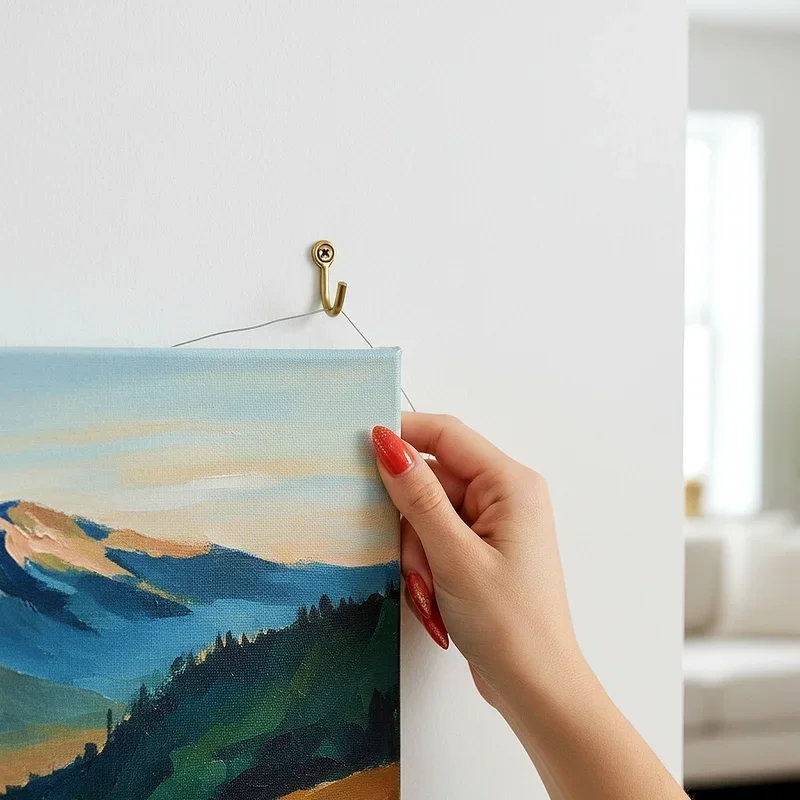
This is where things get real! If your canvas has a wire on the back, pull it taut and measure from the wire's peak to the top of the frame. Subtract this measurement from where you marked your center point on the wall. That's where your hook goes! For D-rings or sawtooth hangers, you'll need to measure the distance between them and transfer those measurements to your wall.
Step 4: Install Your Hardware
Time to make some holes! If you're using wall anchors, drill pilot holes first. These little guides prevent your wall from cracking and make the whole process smoother. Gently tap in your anchors until they're flush with the wall. Then, screw in your hooks or brackets. Going into a stud? You can usually skip the anchors and screw directly in, though pre-drilling still helps.
Step 5: Hang That Canvas!
The moment of truth has arrived! Carefully lift your canvas and align it with your hanging hardware. If you're working with wire, make sure it catches securely on the hook. For D-rings, you'll need to be more precise, getting both sides on their respective hooks simultaneously. Having trouble seeing what you're doing back there? That's where your friend comes in handy!
Step 6: Level and Adjust
Step back and take a look. Chances are, it's not perfectly level on the first try, and that's totally normal! Use your level to check, then make tiny adjustments. Sometimes just a gentle nudge is all it takes. For stubborn canvases that won't stay put, try adding small felt pads to the bottom corners. They'll grip the wall and prevent shifting.
Professional Tips for Gallery-Style Display
Want that museum-quality look? Here's the inside scoop! Creating a gallery wall isn't just about throwing up multiple pieces and hoping for the best. Start by laying out your arrangement on the floor first. Snap a photo for reference, then use painter's tape to outline each piece on the wall before committing to holes. Keep spacing consistent, usually 2 to 3 inches between pieces works beautifully.
Common Mistakes to Avoid
Learning from others' oops moments can save you headaches! The biggest mistake? Not checking the weight capacity of your hanging hardware. That tiny nail might look sufficient, but if your canvas weighs more than a few pounds, you're asking for trouble. Another common goof is hanging artwork too high. Remember, this isn't a gallery where people stand to view art. In your home, people are usually seated, so adjust accordingly.
Maintaining Your Hung Canvas
Once your canvas is up, the job's not quite done! Dust accumulates faster than you'd think, especially on textured surfaces. A soft, dry brush or microfiber cloth works wonders for regular cleaning. Check your hardware every few months too. Houses settle, humidity changes, and things can loosen over time. A quick tightness check prevents unexpected midnight crashes!
Special Considerations for Renters
Renting doesn't mean you can't enjoy art on your walls! Command strips have come a long way and can hold surprisingly heavy pieces. Just make sure you're using enough strips for the weight and following the package directions to the letter. When it's time to move, they come off clean, leaving your security deposit intact. Alternatively, consider leaning larger canvases on shelves or mantels for a casual, contemporary vibe.
When to Call in the Pros
Sometimes, discretion is the better part of valor! If you're dealing with extremely valuable artwork, unusually heavy pieces, or complicated gallery wall arrangements, calling a professional installer might be worth the investment. They've got specialized tools and experience that can save you from costly mistakes. Plus, many offer guarantees on their work, giving you peace of mind.
Troubleshooting Common Issues
Even with the best planning, things can go sideways. Canvas won't stay level? Check if your wire is centered and taut. Visible hooks ruining the aesthetic? Switch to D-rings that hide behind the frame. Wall damage from previous attempts? Spackle and sand those holes before rehanging. Every problem has a solution, so don't get discouraged!
Creative Alternatives to Traditional Hanging
Who says you need to hang everything? Floating shelves create dynamic displays that you can change whenever the mood strikes. Picture ledges let you layer artwork without committing to holes. Even propping large canvases against the wall on a console table can look incredibly chic. Sometimes thinking outside the box, or should I say frame, leads to the most interesting displays!
Conclusion
Getting your canvas painting perfectly positioned on the wall doesn't have to be intimidating! With the right tools, careful measurements, and this How to Hang a Canvas Painting: Step-by-Step Guide in your back pocket, you're all set to transform your space. Remember, the key is patience and preparation. Take your time, measure carefully, and don't hesitate to ask for help with larger pieces. Soon enough, you'll be admiring your handiwork and enjoying your beautifully displayed art every single day!
Read next: 15 Canvas Painting Ideas Anyone Can Try at Home
Frequently Asked Questions
Q1: What's the ideal height for hanging a canvas painting?
A: Center should be 57-60 inches from the floor typically.
Q2: Can I hang heavy canvas on drywall without studs?
A: Yes, use appropriate wall anchors rated for the weight.
Q3: How much space should be between multiple canvases?
A: Generally 2-3 inches between pieces looks most balanced.
Q4: Do Command strips really work for canvas paintings?
A: Yes, when used correctly for appropriate weight limits.
Q5: Should canvas paintings be covered with glass?
A: No, canvas paintings typically don't need glass covering.
Stay up to date with our latest ideas!