15 Easy Acrylic Painting Ideas You’ll Love
Discover 15 easy acrylic painting ideas perfect for beginners! From sunset silhouettes to galaxy art, unleash your creativity with simple techniques.
Ever stared at a blank canvas feeling completely overwhelmed? You're not alone! That pristine white surface can be intimidating, especially when you're convinced you can't even draw a straight line. But here's the secret: acrylic painting isn't about perfection; it's about expression, experimentation, and having a blast with colors. Whether you picked up brushes yesterday or you're returning to art after years away, these easy acrylic painting ideas will have you creating frame-worthy pieces faster than paint dries (which, with acrylics, is pretty darn fast!). From dreamy sunsets that'll transport you to tropical beaches to abstract pieces that let you throw rules out the window, we've gathered projects that prove anyone can be an artist. Ready to transform those "I can't paint" thoughts into "Look what I created!" moments? Let's dive into a world where mistakes become happy accidents and every brushstroke is a step toward artistic confidence!
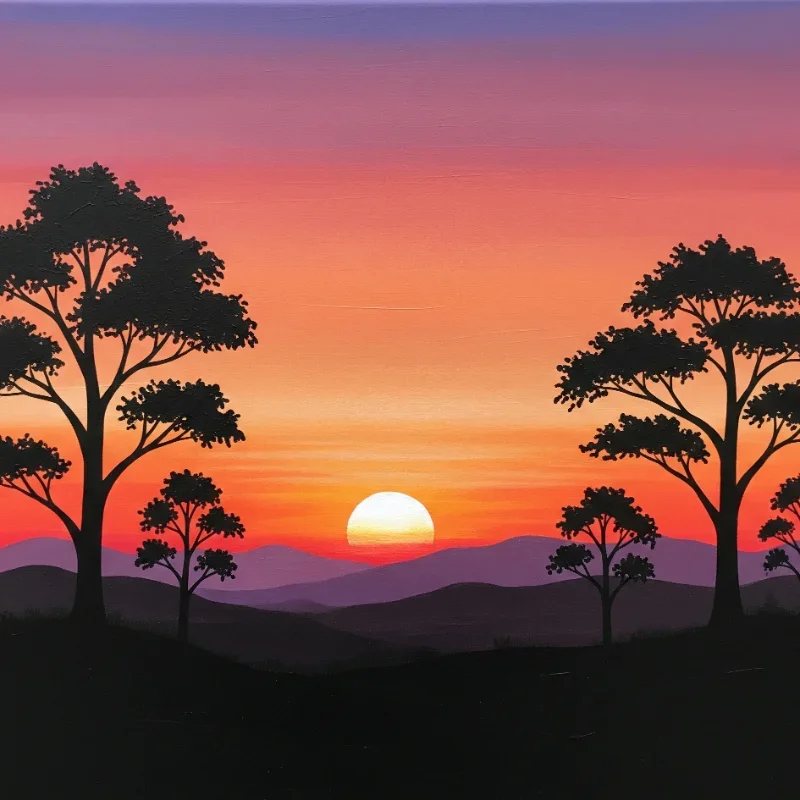
1. Sunset Silhouette Landscapes
Nothing beats the instant gratification of painting a sunset silhouette! This technique is like training wheels for aspiring artists because you literally can't mess it up. Start by creating horizontal bands of colors across your canvas: deep purple at the top, flowing into pink, orange, and yellow near the horizon. Blend these while wet using broad, sweeping motions with a flat brush. The magic happens when you add black silhouettes once the background dries. Trees, mountains, city skylines, or even elephants on safari work beautifully against that glowing sky. The silhouettes hide any wonky proportions while the sunset provides all the wow factor. Use a small round brush for detailed branches or a flat brush for mountain ridges. This project teaches color blending and composition without the pressure of realistic details. Plus, everyone loves a good sunset, making these perfect gifts that look way harder than they actually are!
2. Abstract Color Blocking
Who says art needs to look like something specific? Abstract color blocking is your permission slip to play with paint like a kid again! This technique involves creating bold sections of color that interact in interesting ways. Think Mondrian meets your mood board. Start by lightly sketching random shapes with pencil, or go freehand for more organic results. Fill each section with different colors, leaving some white space for breathing room. The trick is choosing colors that either complement or boldly contrast each other. Try a palette of blues and greens for calm vibes, or go wild with neon pink and electric yellow. Use painter's tape for crisp edges or embrace the wobbles for a more relaxed feel. Layer translucent colors over dried sections for depth. This style works great for modern decor and builds confidence in color mixing. Best part? There's no "wrong" way to do it!
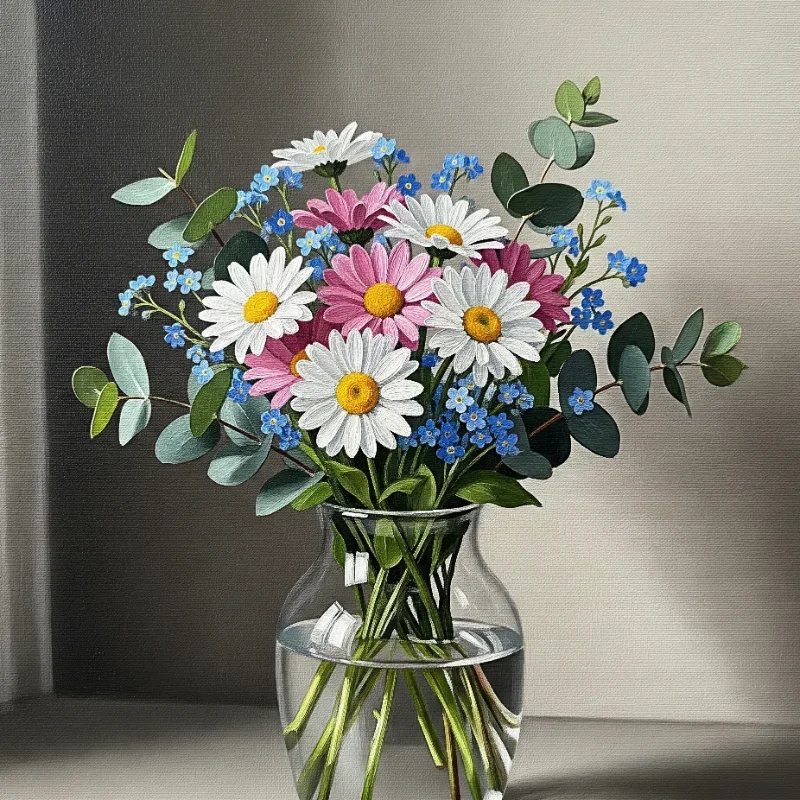
3. Simple Flower Bouquets
Flowers are nature's way of showing off, and painting them is easier than keeping real ones alive! Start with basic shapes: circles for flower heads, lines for stems, and ovals for leaves. Choose one flower type to master first, like daisies or roses. For daisies, paint a yellow circle, then add white petals around it using a small brush. Don't stress about perfect petals; flowers in nature aren't symmetrical either! Build your bouquet by layering flowers at different heights and angles. Add depth by making background flowers slightly lighter and less detailed. Mix greens for variety in your leaves: add yellow for spring freshness or blue for cooler tones. A simple vase can be just a cylinder with a slight curve. This project teaches brush control and color mixing while creating something universally loved. Your kitchen table will thank you for the permanent blooms that never need water!
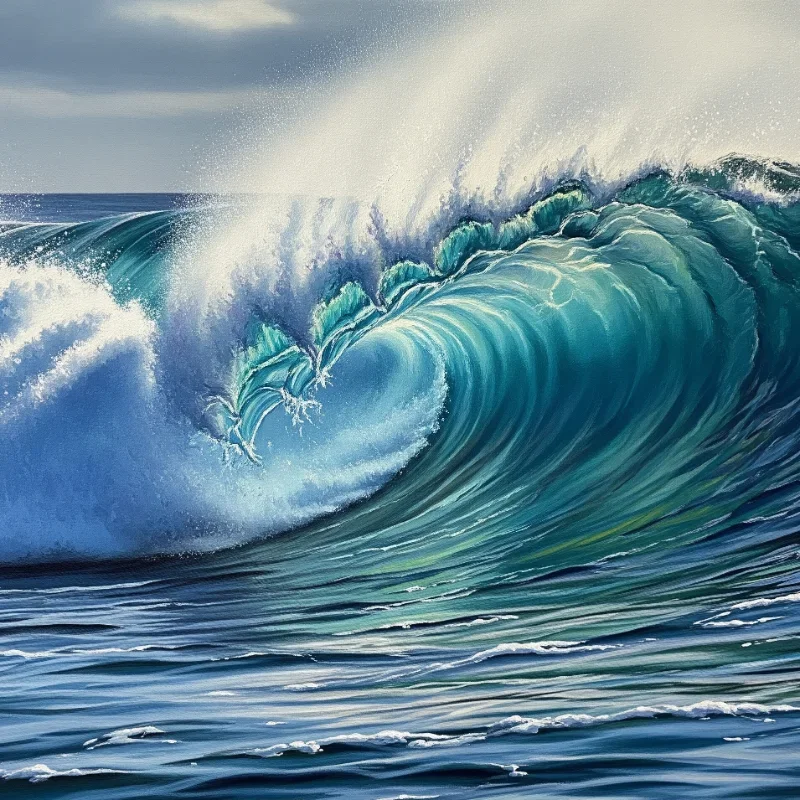
4. Ocean Wave Techniques
Channel your inner beach bum by mastering the art of painting waves! This technique transforms simple brushstrokes into crashing surf that practically smells like salt air. Start with a gradient background: deep blue at the bottom transitioning to lighter blues and turquoise at the horizon. For waves, load a fan brush with white paint mixed with a tiny bit of blue. Drag it horizontally across the canvas with a slight curve, lifting at the end to create foam. Layer multiple waves, making closer ones larger and more detailed. Add highlights on wave crests with pure white using a liner brush. The secret ingredient? A palette knife to scrape through wet paint, creating texture and movement. Splatter diluted white paint for sea spray. This technique is forgiving because ocean waves are naturally chaotic. Each painting becomes a mini vacation, no sunscreen required!
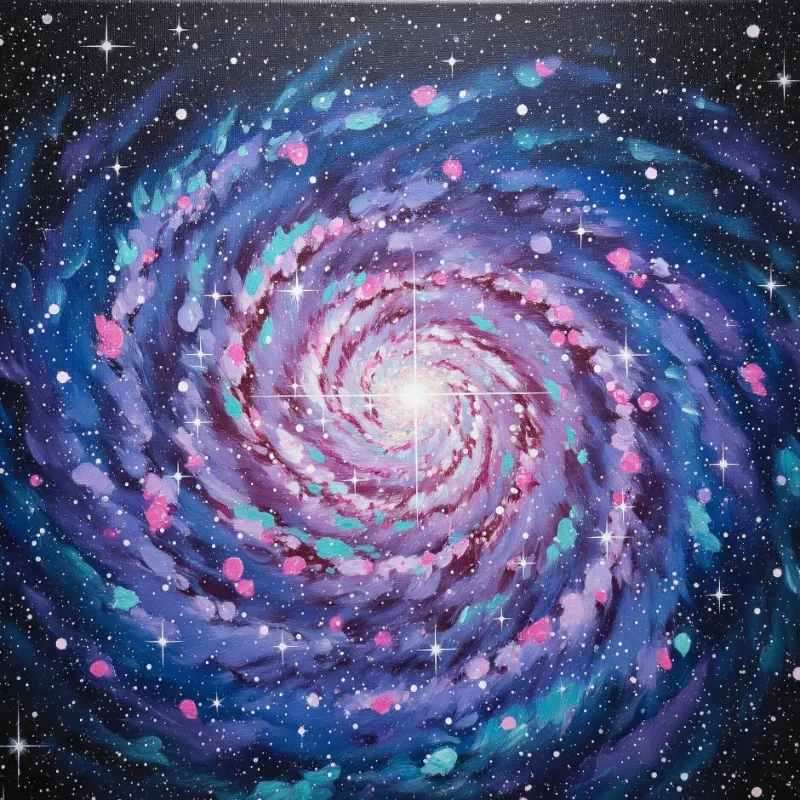
5. Galaxy and Star Paintings
Transform your canvas into a window to the cosmos with this trendy and surprisingly simple technique! Galaxy paintings are perfect for beginners because the messier they are, the more realistic they look. Start with a black canvas or paint one black and let it dry. Using a sponge, dab on patches of deep purple, blue, and magenta in cloudy formations. While still wet, add lighter colors like pink and white to create nebula effects. The key is blending colors irregularly; space isn't uniform! Splatter white paint using a toothbrush for stars, and add larger stars with a small brush for variety. Create planets by tracing circular objects and filling them with swirled colors. Add shooting stars with quick, confident strokes. This project is incredibly forgiving and teaches color blending, texture, and composition. Plus, who doesn't want their own piece of the universe hanging on their wall?
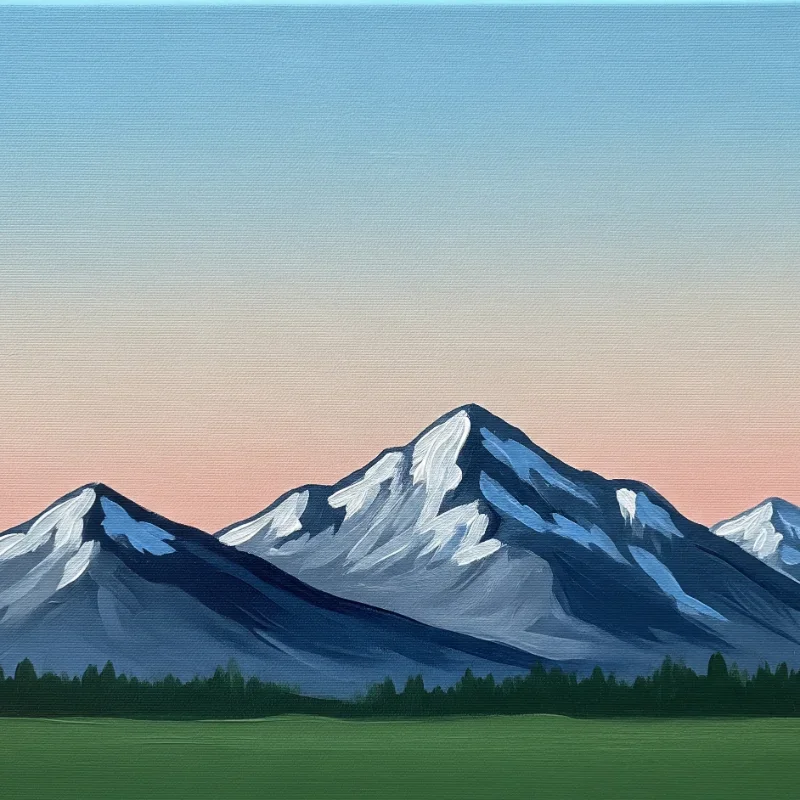
6. Minimalist Mountain Ranges
Less is more with minimalist mountain paintings that prove simplicity can be stunning! This style strips landscapes down to their essence, perfect for modern decor and nervous beginners. Start by mixing several shades of the same color family: maybe five blues from navy to pale sky. Paint your furthest mountain range in the lightest shade, creating simple triangular shapes across the canvas. Each subsequent range gets progressively darker, creating natural depth through color alone. Overlap the ranges slightly for realistic layering. The beauty lies in imperfection; real mountains aren't perfectly triangular! Add interest by varying peak heights and angles. Leave plenty of negative space at the top for a calm, airy feel. This technique teaches color value and composition without requiring detailed brushwork. The finished piece looks like expensive gallery art but takes less than an hour to complete. Minimalism never looked so majestic!
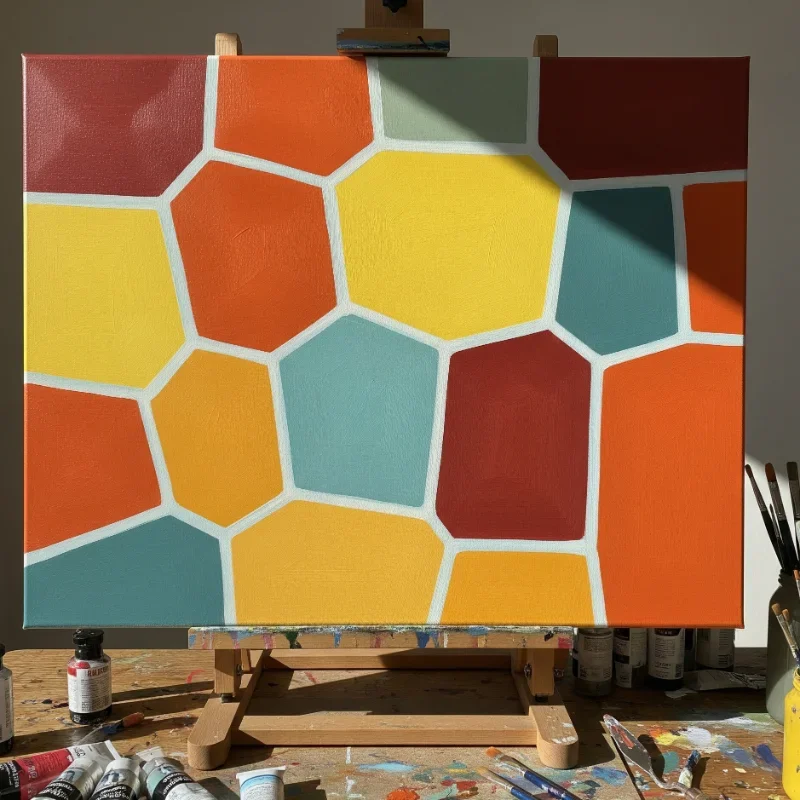
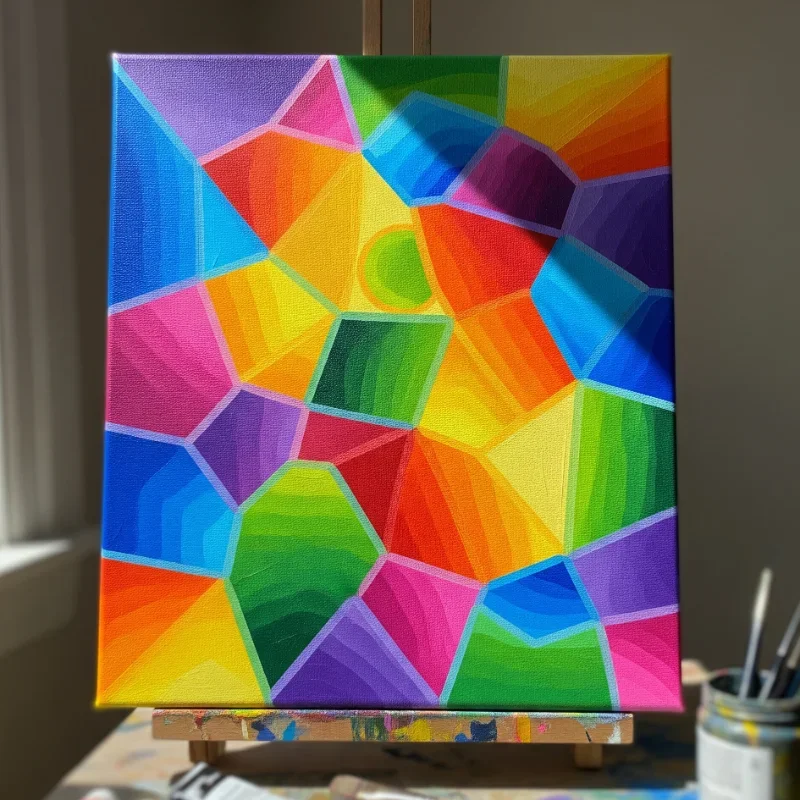
7. Colorful Geometric Patterns
Turn your analytical side into art with geometric patterns that are basically adult coloring books you create yourself! This systematic approach to painting suits those who like structure and predictability. Start by dividing your canvas into sections using a ruler and pencil. Create patterns like triangles, hexagons, or diamonds. The fun begins when you assign colors to your shapes. Try rainbow progressions, complementary color schemes, or monochromatic variations. Use painter's tape for super crisp lines or embrace slight imperfections for a hand-painted charm. Build complexity by adding patterns within patterns: stripes in some triangles, dots in others. This project is meditative and mistakes are easily fixed by painting over them. Geometric art fits any decor style and teaches precision, color theory, and patience. It's like solving a puzzle where you make all the pieces!
8. Tree Branch with Cherry Blossoms
Bring spring indoors any time of year with this delicate yet doable cherry blossom painting! Start with a simple brown branch painted diagonally across your canvas. Don't overthink it; trees grow wonky in nature. Use a liner brush to add smaller branches sprouting off the main one. Now for the fun part: cherry blossoms! Mix pink and white for that perfect blossom shade. Using a small round brush, create five-petaled flowers by making five small strokes meeting at a center point. Vary the pink tones for natural depth. Add unopened buds with darker pink dots. The background can be a soft blue sky or leave it white for Asian-inspired minimalism. Splatter light pink paint for falling petals if you're feeling adventurous. This project combines simple techniques for impressive results and teaches brush control while creating something timelessly beautiful.

9. Rainbow Drip Art
Release your inner child with rainbow drip paintings that turn gravity into your artistic assistant! This technique is ridiculously fun and impossible to mess up. Start by mixing acrylic paint with a flow medium or just water to achieve a honey-like consistency. Line up your colors in rainbow order along the top edge of a canvas. Tilt the canvas and watch magic happen as colors drip down, creating organic streams and puddles. Control the flow by adjusting the angle and rotation. Colors naturally blend where they meet, creating beautiful gradients. For extra pizzazz, start with a white or black background. Add metallic paints for glamorous drips. This project is perfect for those who overthink; gravity doesn't care about perfection! The result is always unique and surprisingly sophisticated. It's basically controlled chaos that looks intentional, making it perfect for modern spaces craving color.

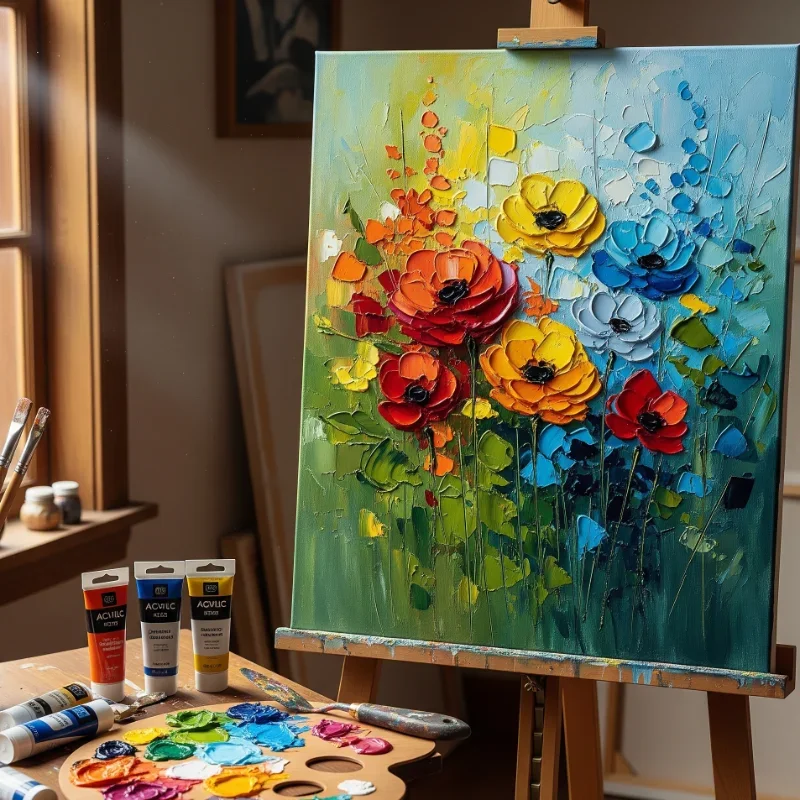
10. Textured Palette Knife Flowers
Put down those brushes and pick up a palette knife for textured flowers that practically jump off the canvas! This technique creates thick, impasto-style paintings that look complex but are actually very forgiving. Load your palette knife with paint like you're frosting a cake. For petals, place the knife flat against the canvas and pull away in a swift motion. Each stroke creates one petal with natural texture and dimension. Build flowers by working from the center outward, overlapping petals for fullness. Mix colors directly on the canvas for natural variations. Add stems and leaves with the knife's edge. The thick paint application means mistakes can be scraped off or painted over easily. This technique works especially well with bold colors and creates paintings with serious presence. Your flowers will have texture you can actually feel, making them irresistible to touch!
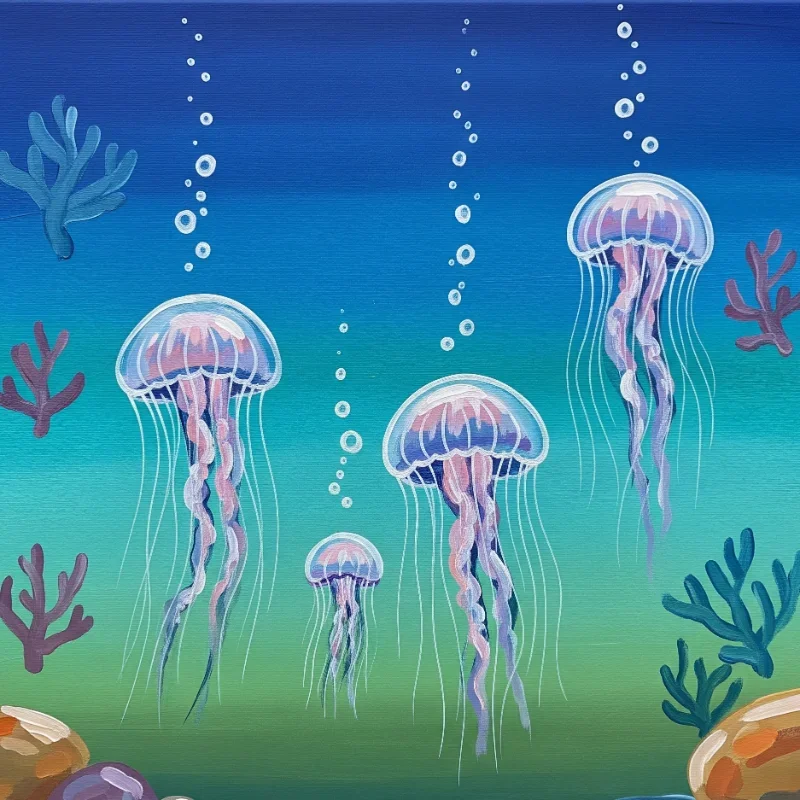
11. Underwater Jellyfish Scene
Dive into an aquatic adventure with ethereal jellyfish floating through your canvas! This project combines several easy techniques for stunning results. Create an underwater background by blending blues and greens vertically, darker at the bottom, lighter toward the surface. For jellyfish, start with translucent dome shapes using white mixed with tiny amounts of pink or purple. While wet, blend edges so they appear to glow. Add flowing tentacles with a liner brush, using wavy, organic lines. The key is making them look weightless and flowing. Layer multiple jellyfish at different sizes and opacity levels for depth. Add tiny bubbles with white dots and sea plants with simple green strokes. Use a dry brush technique to create water movement and light rays filtering down. This painting captures underwater tranquility and teaches transparency effects. It's like having an aquarium without the maintenance!
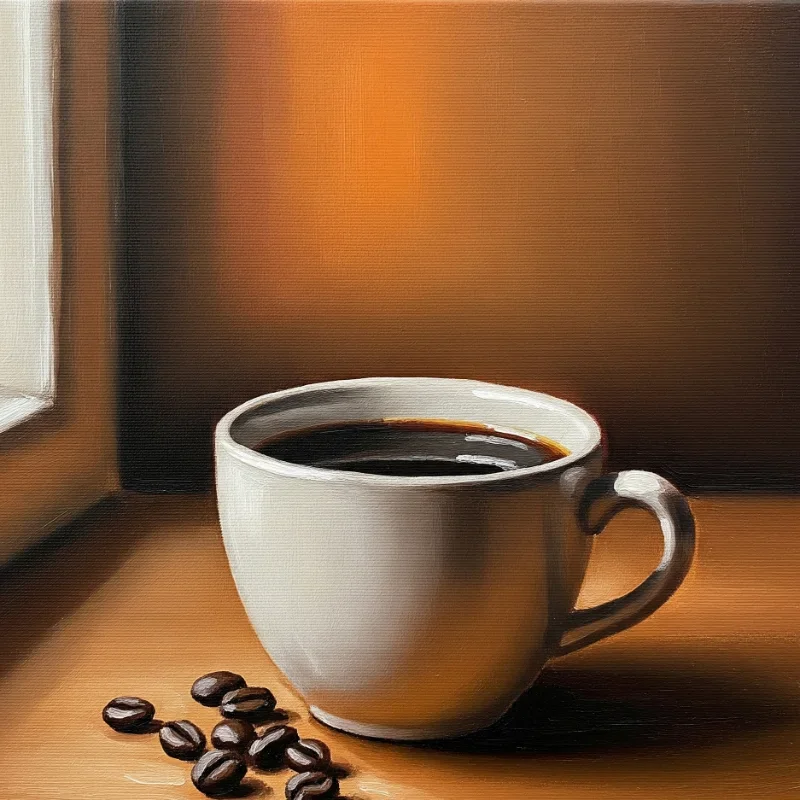
12. Coffee Cup Still Life
Celebrate your caffeine addiction with a cozy coffee cup painting that's perfect for kitchen decor! Still life doesn't mean boring when you paint something you love. Start with a simple cup shape; an oval for the rim and curved lines for the body. Add a handle with two curved lines. Fill your cup with rich brown coffee, leaving a rim to show the cup's edge. The magic is in the details: add steam with wispy white strokes, maybe a heart in foam for latte art. Place your cup on a simple saucer with a shadow underneath for grounding. Background options are endless: a wooden table texture, colorful abstract shapes, or coffee beans scattered around. This project teaches observation and proportion while creating art that speaks to your soul (and morning routine). It's still life that actually relates to your life!
13. Northern Lights Sky
Capture nature's most spectacular light show without freezing in the Arctic! Northern lights paintings create magical effects using simple blending techniques. Start with a dark night sky using deep blue or black. While wet, add vertical streaks of green, blue, and purple using a flat brush. The key is keeping paint wet and blending colors vertically, creating that distinctive aurora movement. Add touches of yellow or pink for variety. Use a fan brush to soften edges and create wispy effects. Paint a simple silhouette landscape at the bottom: pine trees or mountains work perfectly. Splatter white paint for stars, concentrating them away from the brightest aurora areas. The beauty of this project is that northern lights are naturally abstract and flowing, so there's no "wrong" way to paint them. Each canvas becomes a unique light show!

14. Birch Tree Forest
Create a serene forest scene with birch trees that are basically just lines with personality! This project proves that impressive art doesn't require complex techniques. Start with a soft background using diluted blues, greens, or autumn colors applied with a sponge for soft, out-of-focus effects. For birch trunks, use a flat brush to paint vertical white lines of varying thickness. While wet, add thin horizontal black marks using a small brush or even a credit card edge for authentic bark texture. Some marks should be thick, others just hints of lines. Add a few branches reaching outward with a liner brush. The forest floor can be simple horizontal strokes suggesting grass or fallen leaves. This repetitive technique is meditative and forgiving; nature never makes identical trees. The finished piece brings calm, natural beauty indoors and works in any room!

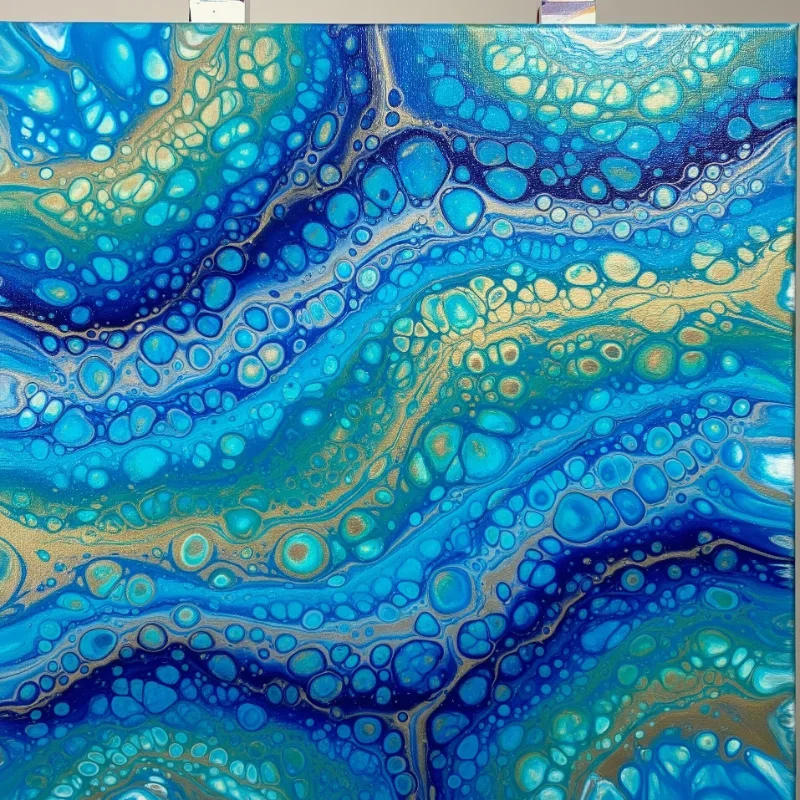
15. Paint Pour Technique
End your artistic journey with the wildly popular paint pour technique that lets fluid dynamics do the work! This method creates unique abstract art every single time. Mix acrylic paint with pouring medium to achieve the perfect flow consistency. Layer different colors in a cup, then flip it onto your canvas or pour directly in patterns. Tilt the canvas to guide paint flow, creating cells, swirls, and organic patterns. Add silicone oil to some colors for amazing cell effects that look like exotic flowers or cosmic formations. The unpredictability is the charm; you're collaborating with physics! Protect your workspace because this gets messy in the best way. Each pour is unrepeatable, making your art truly one-of-a-kind. This technique teaches color interaction and letting go of control. It's perfect for those who love surprises and proves that sometimes the best art happens when you stop trying so hard!
Conclusion
These 15 easy acrylic painting ideas prove that everyone has an inner artist waiting to emerge! From structured geometric patterns to free-flowing paint pours, there's a technique that matches your comfort level and style. Remember, acrylic painting is forgiving, fast-drying, and endlessly experimental. Start with projects that excite you, embrace happy accidents, and watch your confidence grow with each brushstroke. Your walls are waiting for your creative touch!
Read next: 15 Acrylic Painting Ideas Perfect for Beginners
Frequently Asked Questions
Q1: What basic supplies do I need to start acrylic painting?
A: Acrylic paints, brushes, canvas, water container, palette, and paper towels.
Q2: How long does acrylic paint take to dry?
A: Thin layers dry in 10-20 minutes; thick applications take several hours.
Q3: Can I paint over mistakes with acrylics?
A: Yes! Acrylics are opaque and perfect for covering errors completely.
Q4: Should beginners use canvas boards or stretched canvas?
A: Canvas boards are economical for practice; upgrade to stretched later.
Q5: How do I keep acrylic paints from drying too fast?
A: Use a stay-wet palette or mist paints lightly with water spray.
Stay up to date with our latest ideas!