15 Halloween Painting Ideas for Spooky Decor Fun
Transform your home with 15 creative Halloween painting ideas! From ghostly canvases to pumpkin art, discover spooky DIY decor that thrills.
Ready to unleash your inner artist this Halloween? Forget those store-bought decorations that everyone else has! There's something wickedly satisfying about creating your own spooky masterpieces that'll make trick-or-treaters stop in their tracks. Whether you're a painting pro or someone who thinks "brush technique" means frantically cleaning spider webs, these Halloween painting ideas will transform your home into a haunted gallery. Picture this: your walls adorned with ghostly portraits, windows featuring creepy silhouettes, and pumpkins that break all the carving rules. From kid-friendly projects that'll keep little monsters busy to sophisticated pieces that'll impress your Halloween party guests, we've conjured up ideas for every skill level. So grab your brushes, channel your dark side, and let's paint the town orange and black! Who says Halloween decor can't be both spine-tingling and Instagram-worthy?
1. Glow-in-the-Dark Ghost Portraits
Want to give your guests a fright they'll never forget? Glow-in-the-dark ghost portraits are like having friendly spirits that only appear when the lights go out! Start with black canvases and sketch your ghostly figures using white chalk. Then comes the magic: glow-in-the-dark paint that charges up during the day and haunts your walls at night. You can create floating apparitions, spooky faces emerging from darkness, or even paint invisible messages that only appear in the dark. Mix regular white paint with glow paint for subtle daytime visibility. The trick is layering; multiple coats intensify the ghostly glow. Position these near light sources during parties, then dramatically turn off the lights for maximum screams! Kids absolutely lose their minds over these supernatural surprises. Pro tip: use different glow paint colors like green or blue for variety in your spectral gallery.

2. Vintage Horror Movie Poster Recreation
Channel the golden age of horror by recreating classic movie posters with your own spooky twist! Think "Dracula" meets your neighbor Bob, or "Frankenstein" featuring your pet goldfish. These personalized horror posters become instant conversation starters at Halloween parties. Start by studying vintage poster compositions: bold typography, dramatic lighting, and those deliciously over-the-top expressions. Use acrylic paints on large canvases or poster boards for authentic sizing. Don't worry about perfect replication; it's the campy charm that counts! Replace movie stars with family members or pets for hilarious results. Age your creation with tea staining or crackle medium for that authentic vintage feel. The beauty lies in combining classic horror aesthetics with modern humor. Hang these in your entryway or create a whole "horror theater" wall. Your guests will die laughing at your creativity!
3. Spooky Window Silhouettes
Transform your windows into scenes from a nightmare with painted silhouettes that tell terrifying tales! This technique turns ordinary glass into theatrical displays visible from both inside and outside your home. Using washable window paints or removable vinyl, create creeping figures, reaching hands, or mysterious shadows. The key is thinking in layers: foreground elements like cemetery gates, middle ground with zombies rising, and background featuring a full moon. Black paint creates the most dramatic contrast against lit windows at night. You're essentially turning each window into a shadow puppet show frozen in time! Add details like spider webs in corners or bats flying across the scene. During daylight, these create interesting shadows inside your home. Come nightfall, your house becomes the neighborhood's favorite spooky attraction. Best part? Everything washes off easily after Halloween, leaving windows spotless for the holidays.

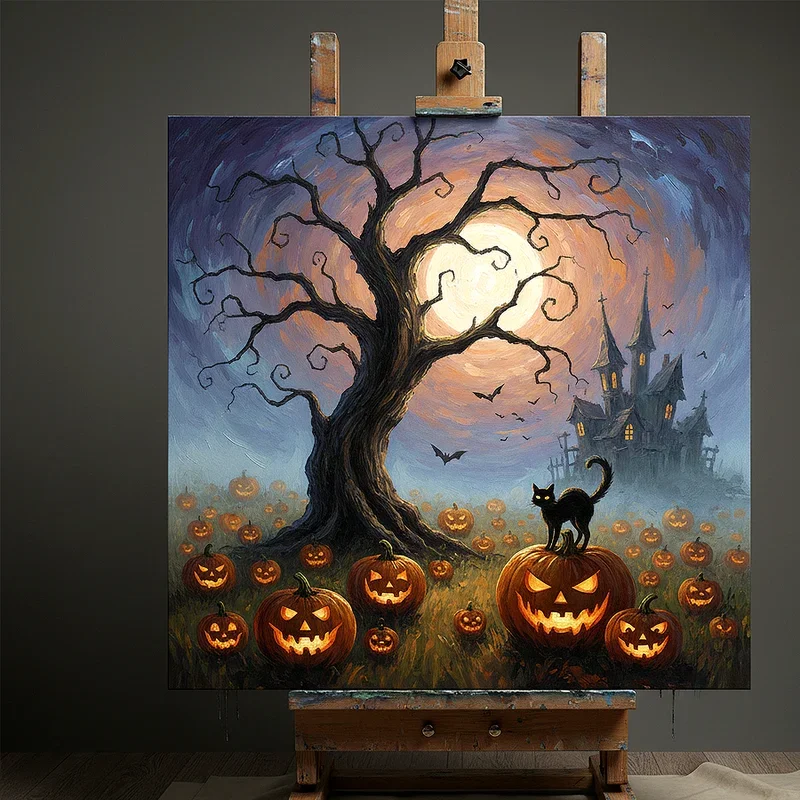
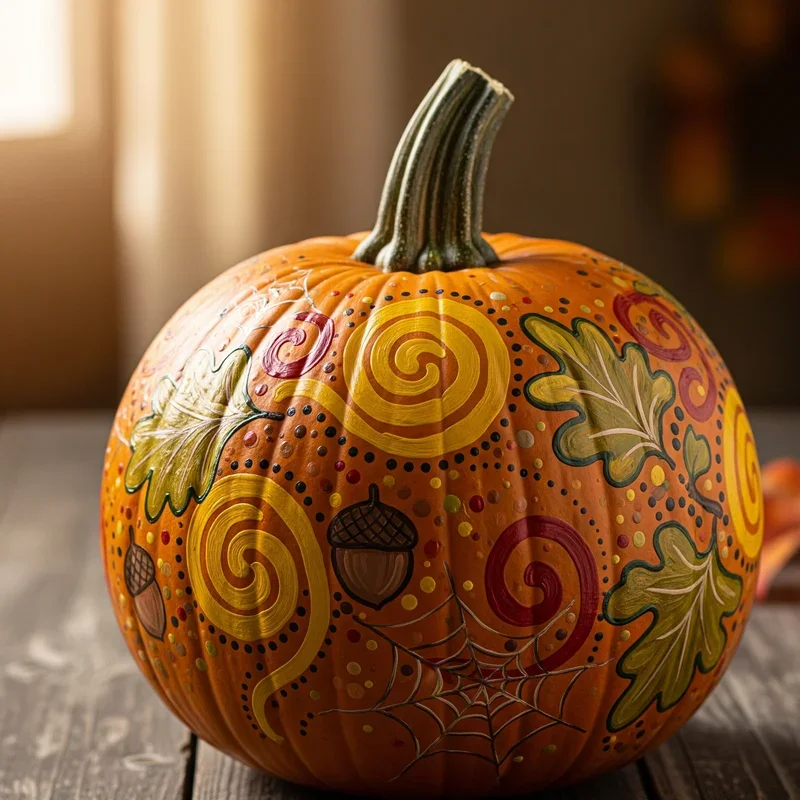
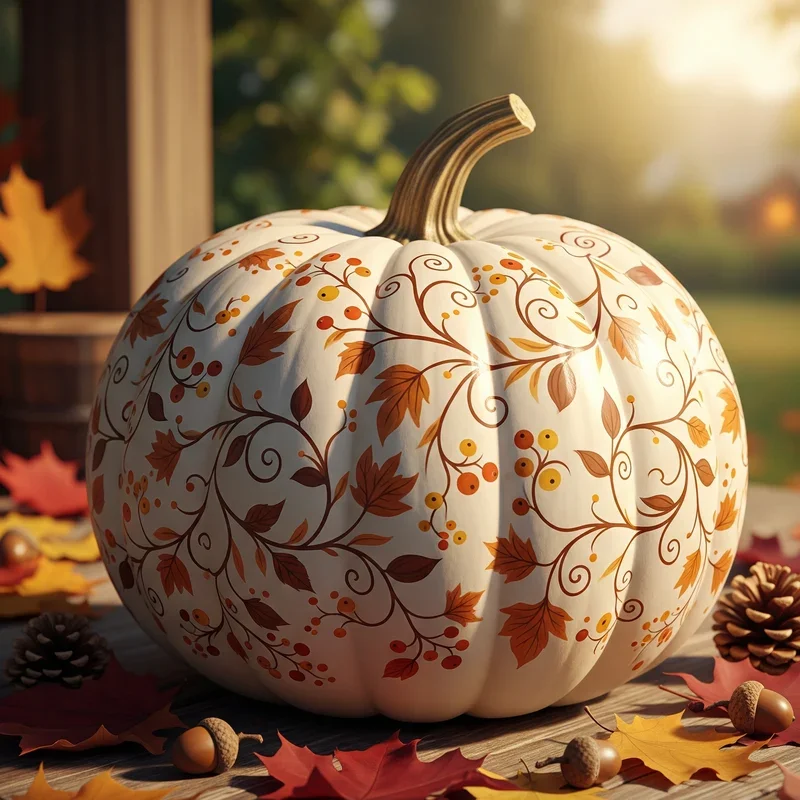
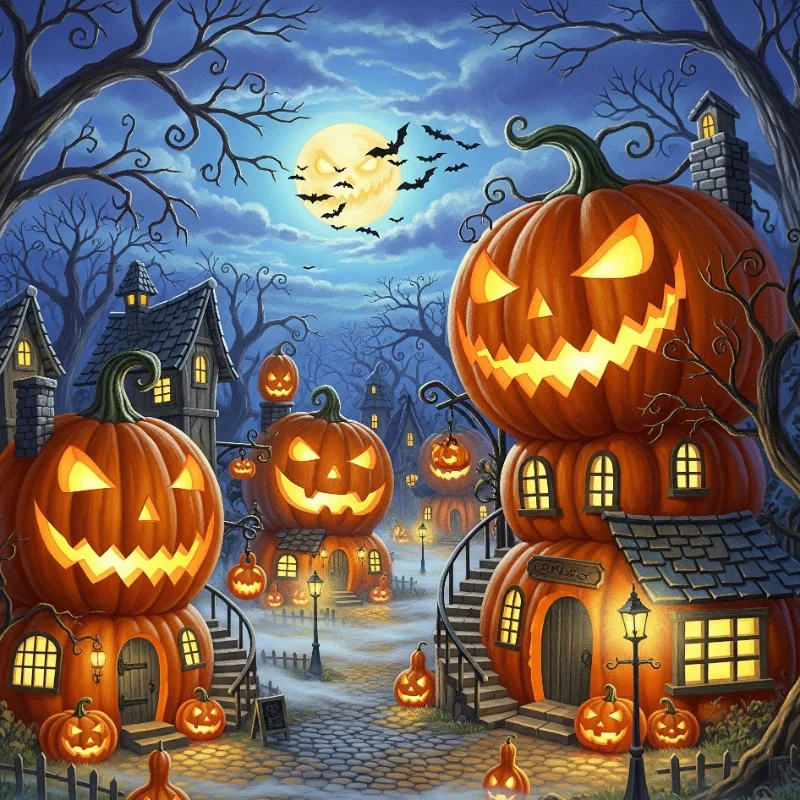
4. Painted Pumpkin Villages
Who says pumpkins need carving when paint can create entire miniature worlds? Painted pumpkin villages are taking Halloween decor by storm, offering mess-free alternatives to traditional jack-o'-lanterns. Picture tiny haunted houses, spooky churches, and ghostly shops all crafted from various sized pumpkins and gourds. Start with white base coats on orange pumpkins for better color vibrancy. Use fine brushes for architectural details like windows, doors, and shingles. Small pumpkins become cottages while tall gourds transform into clock towers or haunted mansions. Create depth with shading and highlights that make flat surfaces appear dimensional. Arrange your village on mantels or tables with moss, miniature trees, and LED tea lights for ambiance. The beauty? No rotting pumpkins! These painted beauties last all season long. Kids can paint simpler versions while adults tackle intricate Victorian haunted houses.
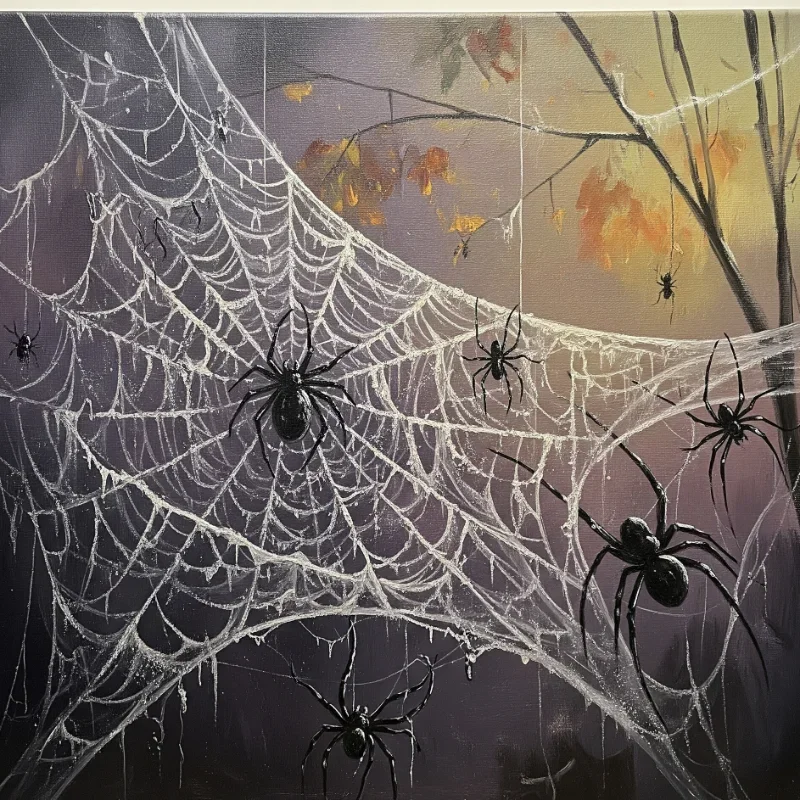
5. Creepy Crawly Spider Web Canvases
Nothing says Halloween quite like spider webs dripping with dew and danger! Creating spider web paintings combines geometric precision with organic flow, resulting in stunning pieces that look complex but are surprisingly simple. Start with dark backgrounds; deep purples, midnight blues, or classic black create perfect backdrops. Use white or silver paint with a thin brush to create the web's foundation: straight lines radiating from a center point. Then connect these spokes with curved lines, getting smaller toward the center. The magic happens when you add details: tiny paint drops for morning dew, a lurking spider crafted with dimensional paint, or glitter for moonlight catching the silk. Try different web styles: perfect geometric patterns for modern decor or wonky, organic webs for rustic charm. These canvases work individually or create dramatic impact when grouped in odd numbers.
6. Day of the Dead Sugar Skull Art
Embrace the colorful side of the afterlife with vibrant Day of the Dead sugar skull paintings! These festive skulls celebrate life rather than fear death, making them perfect for family-friendly Halloween decor. Unlike typical spooky decorations, sugar skulls burst with flowers, patterns, and jewel-bright colors. Start with a basic skull shape on canvas, then let your imagination run wild with decorative elements. Paint roses around eye sockets, add geometric patterns on foreheads, and create intricate lace-like designs on cheeks. Use metallic paints for extra glamour: gold teeth, silver highlights, copper accents. The key is symmetry balanced with organic flourishes. Each skull tells a story through its decorations. Create a gallery wall with different sized skulls, each featuring unique color schemes. These pieces transition beautifully into fall decor after Halloween. They're like giving death a makeover with a rainbow!

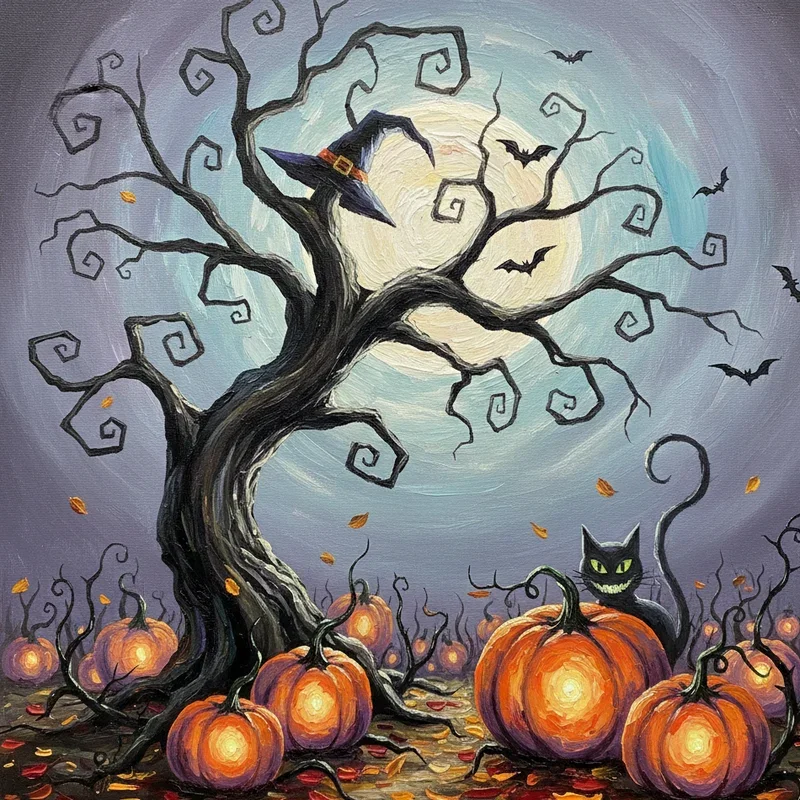
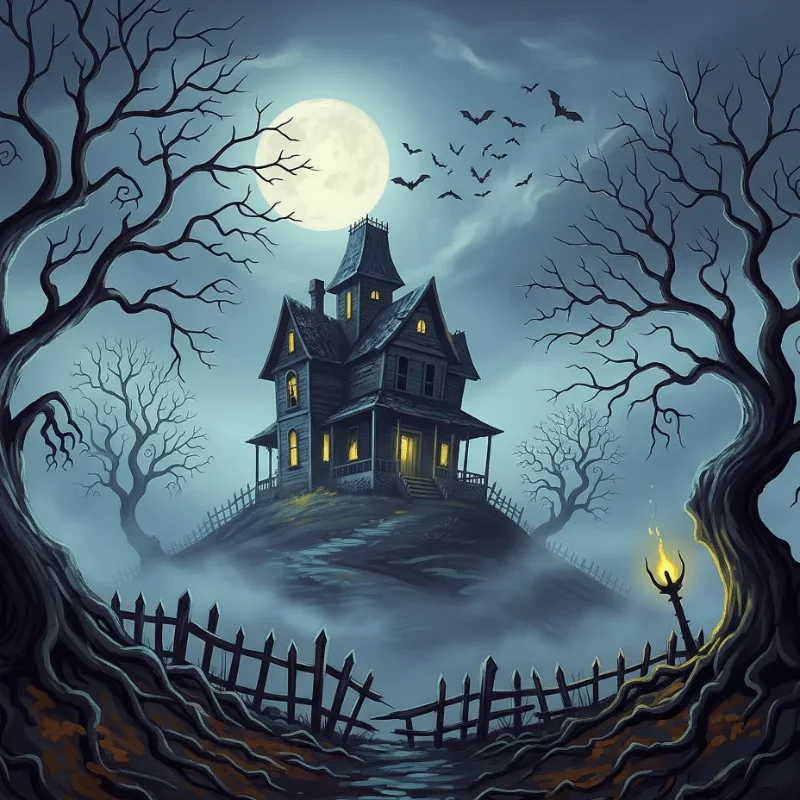
7. Haunted House Landscape Paintings
Every neighborhood needs that one house that gives everyone chills, so why not paint your own? Haunted house landscapes let you architect fear on canvas, creating atmospheric scenes that draw viewers into spooky stories. Start with moody skies: storm clouds gathering, purple twilights, or fog-shrouded moons. Your haunted house should lean impossibly, with crooked shutters and glowing windows suggesting supernatural inhabitants. Add environmental storytelling through details: overgrown gardens, broken fences, mysterious shadows in windows. Use perspective tricks to make houses loom larger than life. Bare trees with reaching branches frame your composition like skeletal fingers. The path leading to the door should beckon and warn simultaneously. Layer your paint for texture on shingles and siding. These paintings set perfect mood lighting for Halloween gatherings. Each brushstroke adds another chapter to your house's haunted history!
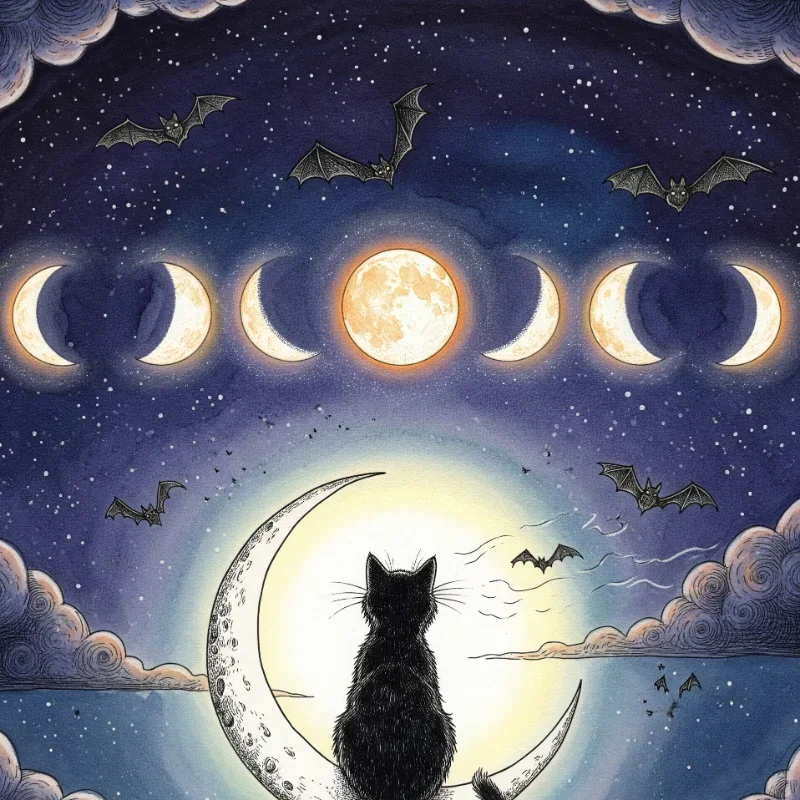
8. Black Cat Moon Phase Wall Art
Combine mysticism with feline charm by creating black cat silhouettes against different moon phases! This trendy design merges witchy aesthetics with modern minimalism, perfect for year-round display. Paint a series of small canvases, each featuring a different moon phase from new to full. Against each luminous orb, position black cats in various poses: arching backs, sitting mysteriously, or mid-prowl. The contrast between detailed moon textures and solid cat silhouettes creates striking visual interest. Use metallic silver or pearl paints for moon highlights that catch light differently throughout the day. Some cats can interact with their moons: batting at crescents or curled within full circles. Arrange canvases in a line or creative pattern on your wall. This project teaches lunar cycles while celebrating Halloween's most iconic familiar. The result? Gallery-worthy art that's educational and enchanting!
9. Dripping Blood Effect Paintings
Ready to add some gore to your decor without the actual mess? Dripping blood paintings create dramatic impact using simple techniques that'll make visitors do double-takes. The secret lies in paint consistency and gravity! Mix red paint with a touch of brown and purple for realistic blood tones. Thin it slightly with water or medium for perfect dripping consistency. Apply paint liberally at the top of your canvas, then let gravity create natural drips. You can guide drops with brushes or let chaos reign. Layer different shades for dimensional effects. Create words that appear to bleed, handprints that seem fresh, or abstract patterns that suggest crime scenes. Add context with stenciled words like "HELP" or "RUN" partially obscured by drips. These work brilliantly on old mirrors, picture frames, or canvas. The technique is oddly satisfying and therapeutic despite its macabre appearance!

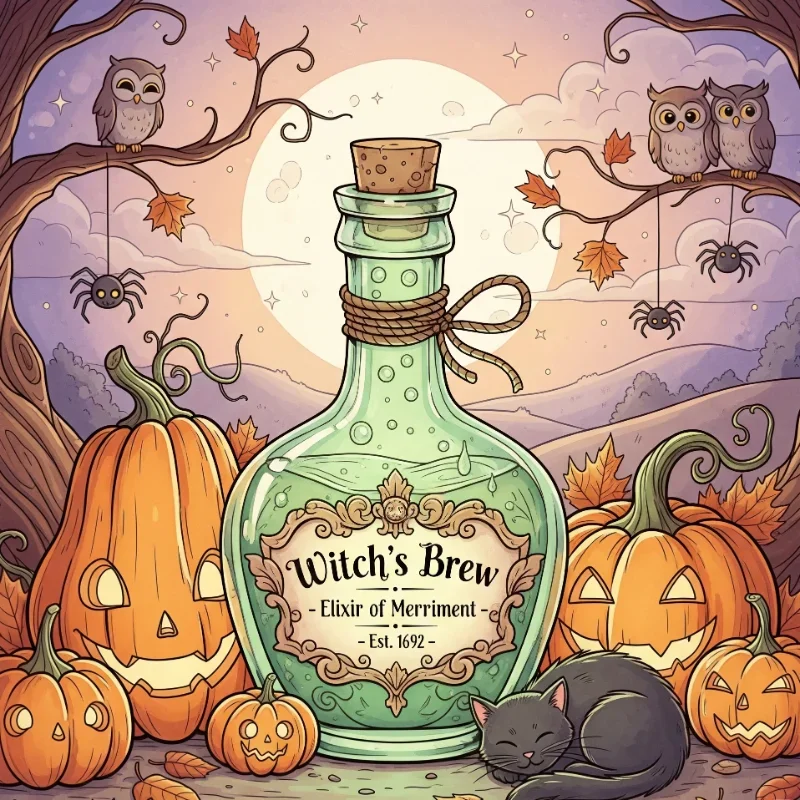
10. Witch's Potion Bottle Labels
Transform ordinary bottles into a witch's apothecary with hand-painted labels that tell tales of magical ingredients! This project combines calligraphy, illustration, and imagination to create display-worthy potion collections. Start with various bottle shapes: round for "Eye of Newt," tall for "Essence of Nightshade," square for "Powdered Moonbeam." Paint directly on bottles or create separate labels on parchment-style paper. Include ingredient names in spooky fonts, add mysterious symbols, and paint tiny illustrations of contents. Age your labels with tea staining and burnt edges for authenticity. Consider adding warnings like "Do Not Drink" or "Handle with Curse-Proof Gloves." Use metallic paints for magical shimmer on important potions. Group bottles on shelves with dried herbs, crystals, and candles for full effect. Each label becomes a mini artwork that sparks imagination about its mystical contents. Your kitchen instantly transforms into a supernatural laboratory!
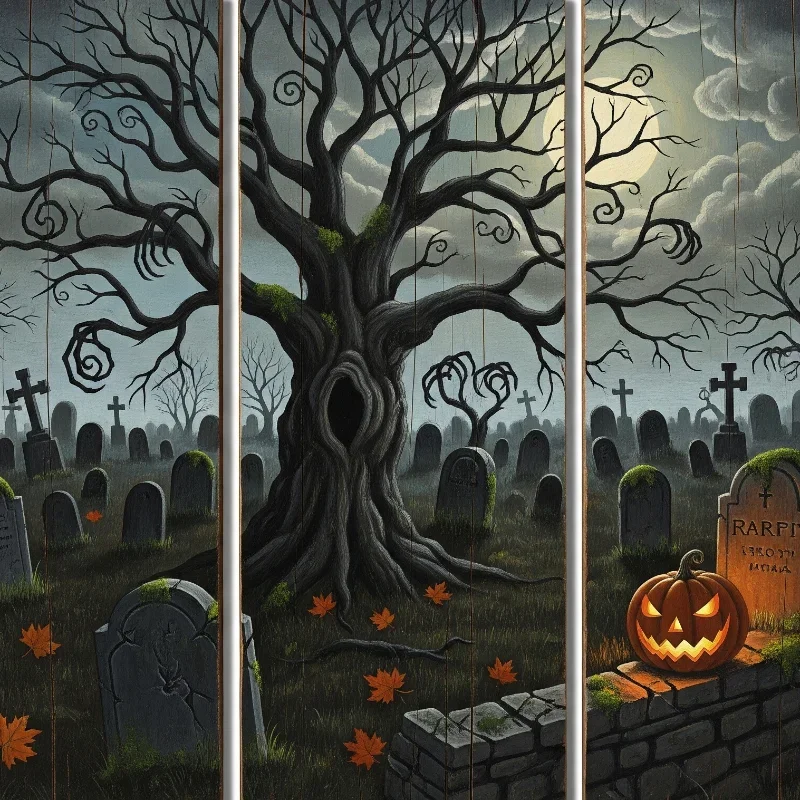
11. Cemetery Scene on Wood Panels
Bring the graveyard home by painting atmospheric cemetery scenes on rustic wood panels! The natural wood grain adds organic texture that enhances the aged, weathered feel of old graveyards. Choose panels with interesting knots or grain patterns that can incorporate into your design as tree roots or ground texture. Paint layers of fog rolling between weathered headstones, each marker telling its own story through epitaphs and dates. Add elements like wrought iron gates, crow silhouettes, and gnarled trees whose branches seem to reach for viewers. Use dry brush techniques for aged stone textures and thin glazes for ethereal fog effects. The wood's natural brown tones peek through, creating depth without extra effort. These panels look fantastic propped on mantels or hung gallery-style. Each piece becomes a window into Halloween's most iconic location, minus the actual grave-digging!
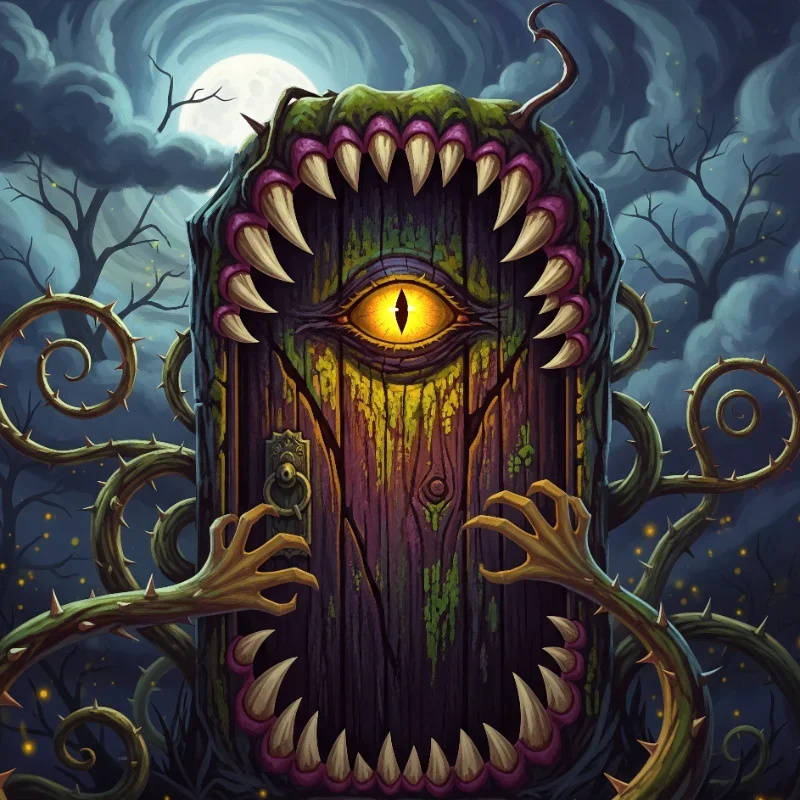
12. Monster Door Portraits
Turn every door in your house into a monster's face with this interactive painting idea! Door portraits transform functional spaces into fun, surprising decorations that delight visitors. The door becomes your canvas, with the doorknob serving as a nose or cyclopean eye. Paint around existing hardware to create faces: vampire mouths around door frames, werewolf fur textures on panels, or zombie skin peeling away from edges. Use the door's rectangular shape creatively; vertical doors become tall monsters like Frankenstein, while wider doors suit horizontal creatures like giant spiders. Removable paints or vinyl ensure easy cleanup post-Halloween. Add 3D elements like paper teeth or googly eyes for extra dimension. Opening doors becomes an adventure when you're entering through a monster's mouth! This idea works especially well for children's rooms or bathrooms, turning mundane spaces into Halloween surprises.
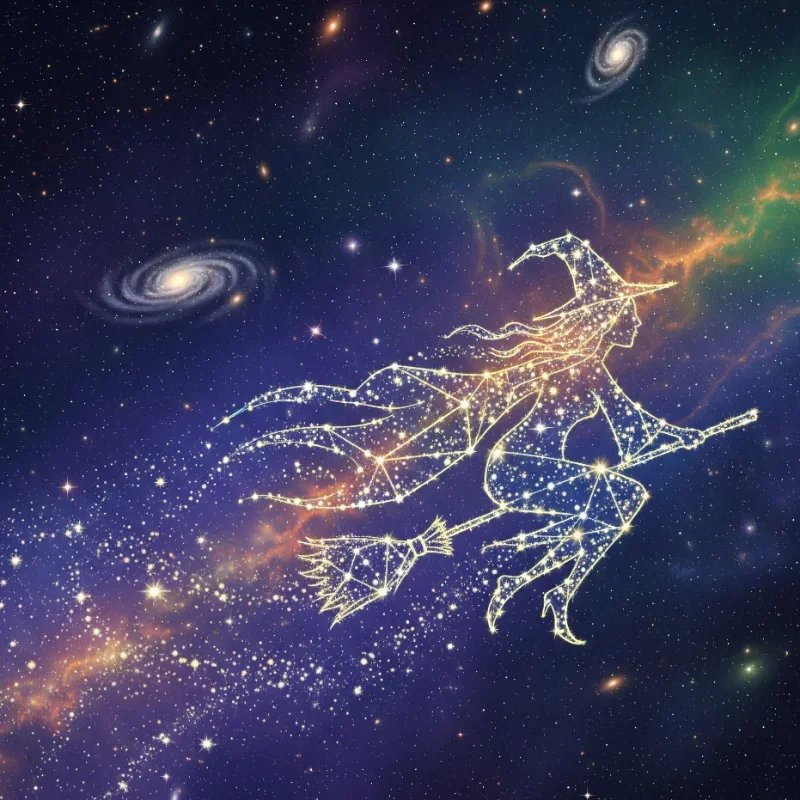
13. Constellation Witch Flying Across Stars
Merge astronomy with Halloween magic by painting witches flying through actual constellation patterns! This sophisticated take on traditional witch imagery appeals to both science lovers and fantasy fans. Start with deep navy or black backgrounds representing night sky. Research real constellation patterns and paint them with tiny dots of white or glow paint. Then, position your witch's silhouette strategically flying through recognizable star patterns like Orion or the Big Dipper. Her broomstick trail can connect stars, creating new magical constellations. Use metallic paints for stars that twinkle in changing light. Add subtle aurora effects with diluted greens and purples for extra celestial magic. This educational art piece teaches constellation recognition while maintaining Halloween themes. The result is gallery-quality art that sparks conversations about both astronomy and folklore. It's like giving the night sky a Halloween makeover!
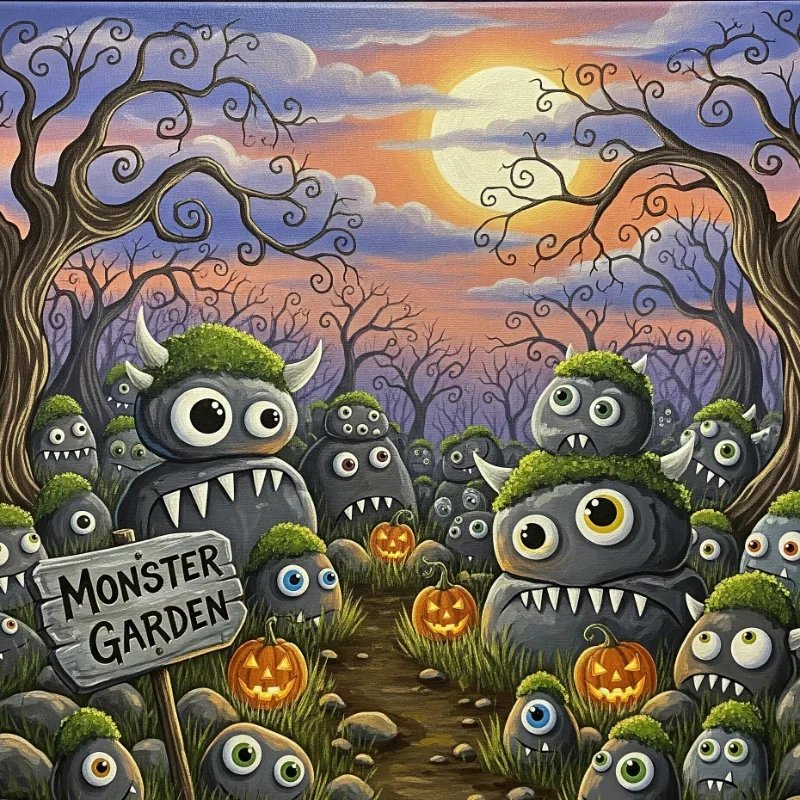
14. Painted Rock Monster Garden
Transform your garden into a monster sanctuary with painted rocks that bring creatures to life! This budget-friendly project turns ordinary stones into extraordinary Halloween decorations. Collect various sized smooth rocks; large ones become monster bodies while smaller ones create features or baby monsters. Paint base colors first: green for swamp creatures, purple for alien beings, orange for pumpkin monsters. Add personality with googly eyes, sharp teeth, tentacles, or fur textures. Seal paintings with outdoor varnish for weather resistance. Arrange your rock monsters throughout gardens, creating scenes like monster families or creature conventions. Hide some partially behind plants for surprise discoveries. Use glow-in-the-dark accents for nighttime magic. These durable decorations survive weather and can be rearranged for fresh displays. Kids love hunting for hidden monsters while adults appreciate the whimsical garden art. Your landscape becomes an outdoor gallery of friendly (or frightening) faces!
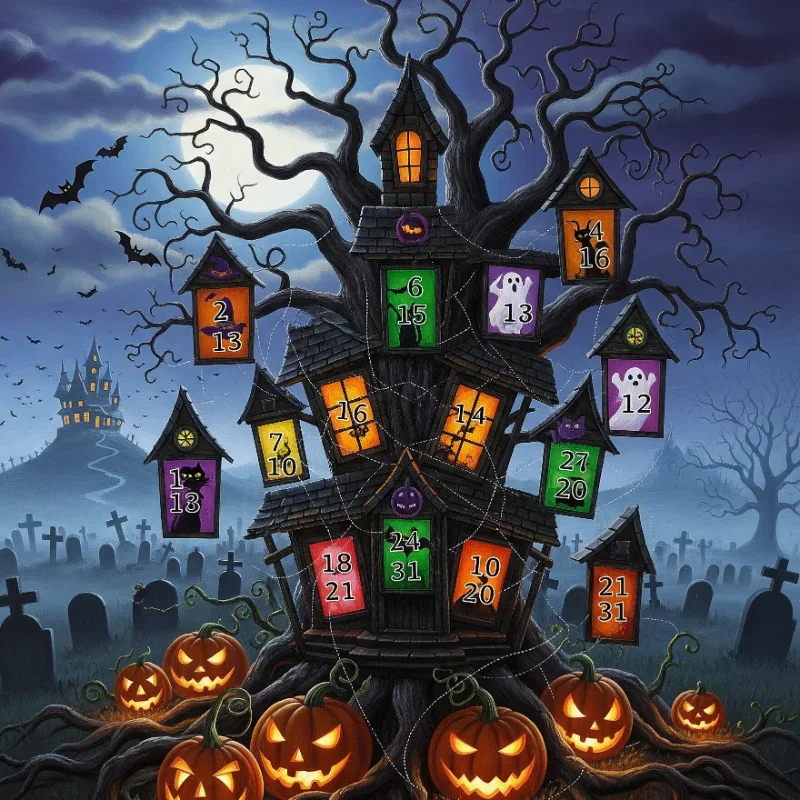
15. Halloween Countdown Calendar Art
Build excitement for Halloween with a painted countdown calendar that's artwork and functional decor combined! Unlike store-bought versions, your hand-painted calendar becomes a cherished tradition families anticipate yearly. Create 31 spaces using various designs: pumpkins, ghosts, witches' hats, candy corn, bats, and more. Paint on large canvases, wood boards, or even directly on walls with removable paint. Each day's space needs interaction methods: pockets for treats, doors that open to reveal images, or velcro attachments for moving markers. Use consistent color schemes tying all elements together while maintaining variety. Add October dates with decorative numbers in spooky fonts. Include special markings for Halloween party dates or costume-making deadlines. The calendar becomes both organizational tool and art installation. Families develop traditions around daily reveals, building Halloween anticipation throughout October. After Halloween, it stores flat for next year's countdown excitement!
Conclusion
These 15 Halloween painting ideas prove that creating spooky decor doesn't require professional art skills, just imagination and enthusiasm! Whether you're painting glowing ghosts or detailed door monsters, each project adds personal touches that store-bought decorations can't match. Start with simpler projects and work toward complex pieces as confidence grows. Remember, Halloween art celebrates imperfection and creativity over precision. Your painted masterpieces will become cherished decorations that tell your unique Halloween story year after year!
Read next: 15 Halloween Drawing Ideas for Kids and Adults
Frequently Asked Questions
Q1: What type of paint works best for Halloween decorations?
A: Acrylic paints work best; they're versatile, quick-drying, and easy to clean up.
Q2: Can I make these paintings weather-resistant for outdoor display?
A: Yes, seal finished paintings with outdoor varnish or use exterior-grade paints.
Q3: How do I remove window paintings after Halloween?
A: Use warm soapy water and a scraper; most window paints remove easily.
Q4: Are these painting projects suitable for children?
A: Most projects work for kids with supervision; use non-toxic paints for safety.
Q5: How far in advance can I start painting Halloween decorations?
A: Start anytime; properly stored paintings last years, building your collection gradually.
Stay up to date with our latest ideas!