How to Paint Abstract Art for Beginners Step-by-Step
Learn how to paint abstract art with our beginner-friendly guide. Discover techniques, materials, and tips to create stunning pieces today.
So, you've been staring at those wild, colorful abstract paintings in galleries and thinking, "I could never do that," right? Well, hold that thought. Abstract art isn't about perfection or following strict rules. It's actually one of the most forgiving and liberating forms of artistic expression out there. Unlike realistic painting where you're sweating over every detail, abstract art lets you throw caution to the wind and just... create. Here's the thing. You don't need a fancy art degree or years of training to dive into abstract painting. What you do need is a willingness to experiment, a bit of courage to make mistakes, and the understanding that there's no such thing as "wrong" in abstract art.
Understanding What Abstract Art Really Means
Before we jump into the how-to part, let's clear up what abstract art actually is. Basically, it's art that doesn't attempt to represent external reality accurately. Instead of painting a bowl of fruit that looks exactly like a bowl of fruit, abstract artists use colors, shapes, forms, and gestural marks to achieve their effect.
Think of it this way. Abstract art is like music for your eyes. Just as a song can make you feel something without using words, abstract paintings communicate through visual elements alone. Some abstract pieces are completely non-representational, while others might hint at real-world objects in a simplified or distorted way.
The beauty of abstract art lies in its subjectivity. What one person sees as chaos, another might see as harmony. There's no pressure to make something everyone understands because interpretation is part of the experience. Pretty freeing, isn't it?
Gathering Your Essential Materials
Alright, let's talk supplies. You don't need to break the bank here, especially when you're just starting out. Here's what you'll want to grab:
Paints are your obvious first choice. Acrylics work wonderfully for beginners because they dry quickly, clean up with water, and are relatively inexpensive. Start with primary colors (red, blue, yellow), black, and white. You can mix these to create virtually any color you need.
Canvas or painting surface comes next. Pre-stretched canvases are convenient, but canvas boards or even thick paper works fine when you're experimenting. Start with a medium size, maybe 16x20 inches, so you have enough space to work without feeling overwhelmed.
Brushes in various sizes will give you flexibility. Grab a few flat brushes, some round ones, and maybe a large brush for covering big areas quickly. Don't forget that unconventional tools like sponges, palette knives, or even old credit cards can create interesting effects.
You'll also need a palette for mixing colors (a disposable paper palette works great), containers for water, paper towels or rags, and an easel or flat surface to work on. Oh, and protect your clothes and workspace because things will get messy.
Preparing Your Workspace for Creative Freedom
Setting up your space properly makes a huge difference. Trust me on this one. You want a spot where you can make a mess without worrying about ruining anything. Cover your floor with a drop cloth or old newspapers. Make sure you've got good lighting, preferably natural light, though a bright lamp works in a pinch.
Arrange your materials within easy reach. There's nothing more frustrating than getting into a creative flow only to realize your favorite brush is across the room. Keep your paints, brushes, water, and palette close by.
Ventilation matters too, even with acrylics. Open a window if you can. And here's a pro tip: wear old clothes or an apron you don't care about. Paint has a funny way of ending up everywhere except where you intended.
Choosing Your Color Palette
Now we're getting to the fun stuff. Your color choices will set the mood for your entire piece. Warm colors like reds, oranges, and yellows create energy and excitement. Cool colors such as blues, greens, and purples tend to feel calming and introspective.
You don't have to use every color in your collection. In fact, limiting your palette often creates more cohesive, striking pieces. Try starting with just three or four colors plus white. This constraint actually boosts creativity because it forces you to think about mixing and layering.
Consider the emotion you want to convey. Angry or passionate? Go bold with reds and blacks. Peaceful and serene? Think soft blues and greens. There's no rulebook here, just trust your gut.
Starting With Basic Shapes and Forms
Here's where you actually put paint to canvas. How to Paint Abstract Art for Beginners Step-by-Step starts with letting go of expectations. Begin by loosely sketching out some basic shapes with a light pencil or thin paint. Circles, squares, triangles, or organic flowing shapes all work beautifully.
Don't obsess over making these perfect. Wonky shapes often look more interesting anyway. Think of this as mapping out the general composition rather than creating a detailed plan. You're establishing where different elements might go, nothing more.
Some artists prefer to skip sketching entirely and dive straight in with paint. If that feels right, go for it. Pour or brush a wash of color across your canvas as an underpainting. This creates a base that adds depth to layers you'll add later.
Exploring Different Application Techniques
The way you apply paint dramatically affects your final result. Brushwork is the most obvious method, but vary how you use your brushes. Try short, choppy strokes for texture. Long, sweeping movements create flow and movement. Dabbing with a brush gives you a stippled effect.
Palette knives aren't just for mixing. They're fantastic for applying thick paint, creating sharp edges, or scraping through wet paint to reveal layers underneath. The sculptural quality they provide adds serious visual interest.
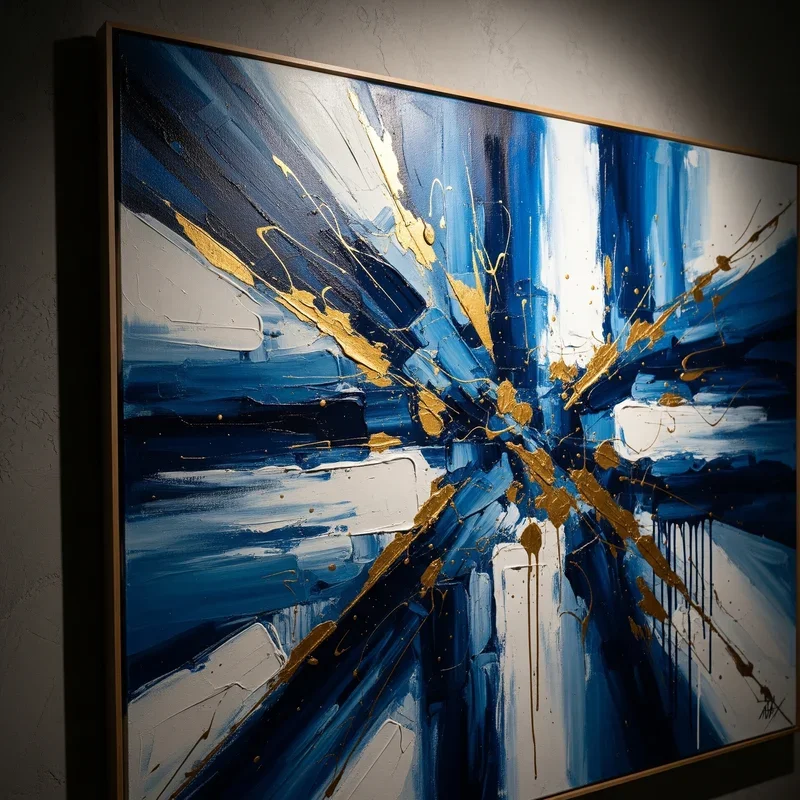
Pouring and dripping techniques can produce unpredictable, organic results. Thin your paint with a bit of water or medium, then pour or splatter it onto your canvas. Let gravity and chance play a role in your composition. Jackson Pollock made a whole career out of this approach.
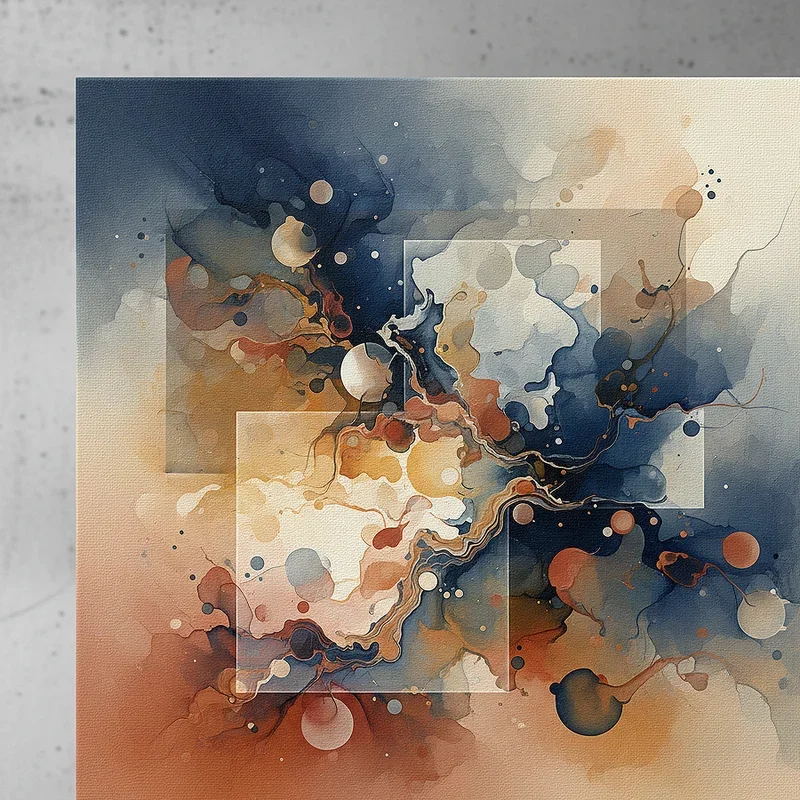
Don't forget about negative space. Sometimes what you don't paint matters as much as what you do. Leaving areas of your canvas bare or lightly covered creates breathing room and contrast.
Layering Colors for Depth and Interest
Layering transforms a flat painting into something with real depth. Start with your lightest or most transparent colors, then gradually build up to darker or more opaque ones. Each layer should be completely dry before adding the next, unless you're intentionally blending wet-into-wet.
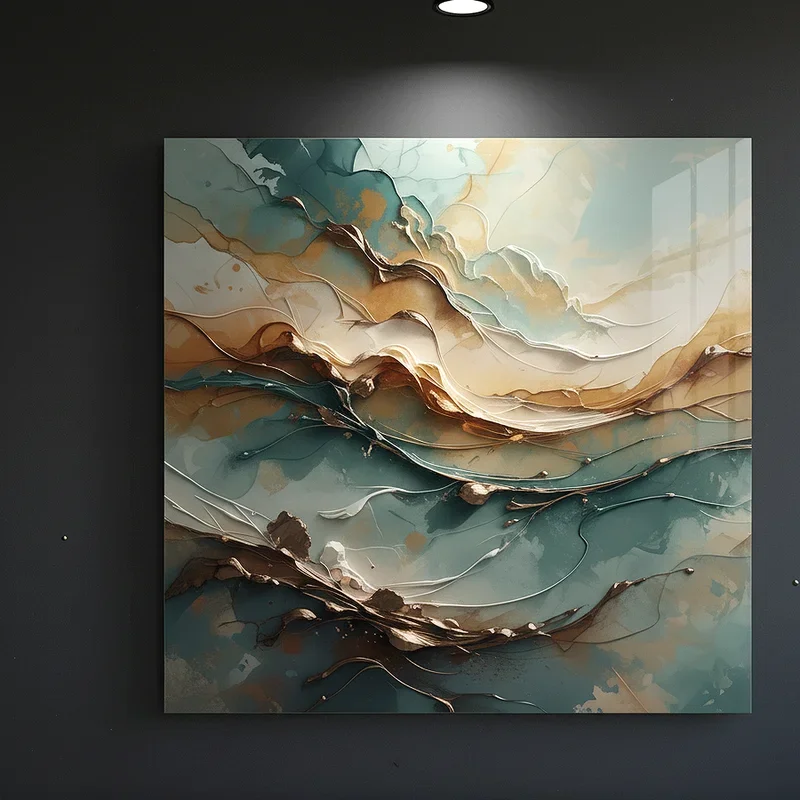
Transparent layers create a glowing effect. Mix your paint with glazing medium or just thin it with water. When you brush this over dried paint, the underlayer shows through, creating optical mixing that's way more interesting than flat color.
Textural layers add physical dimension. Apply paint thickly with a palette knife or heavily loaded brush. This impasto technique catches light differently and creates shadows that change as you view the painting from different angles.
Adding Contrast and Visual Balance
Contrast makes your painting pop. Without it, everything blends together into visual mush. Create contrast through color (light against dark), texture (smooth against rough), shape (geometric against organic), and size (large elements against small ones).
Balance doesn't mean symmetry. Asymmetrical balance often feels more dynamic and interesting. Imagine your canvas divided into a grid. Distribute visual weight across different sections so no single area dominates unless that's your intention.
Step back from your work regularly. Like, put down your brush and walk across the room. Distance gives you perspective on whether your composition feels balanced or lopsided. Your eye should travel around the painting naturally without getting stuck in one spot.
Incorporating Texture and Mixed Media
Texture adds a tactile quality that draws viewers in. You can create texture with thick paint, but why stop there? Gesso applied with a comb or textured tool creates raised patterns. Sand or modeling paste mixed into paint produces gritty surfaces.
Collage elements bring another dimension entirely. Torn paper, fabric scraps, or found objects glued to your canvas before or after painting create unexpected focal points. Just make sure everything's securely attached with appropriate adhesive.
Mark-making tools beyond brushes open up new possibilities. Try scratching into wet paint with the end of a brush, dragging a comb through thick paint, or pressing bubble wrap into your surface. Experimentation is the name of the game.

Knowing When Your Painting Is Finished
This is probably the trickiest part. When do you stop? There's this temptation to keep adding and tweaking until you've overworked everything. Here's a secret: most paintings go through an ugly phase in the middle. Push through it.
Walk away for a day if possible. Fresh eyes reveal whether your piece feels complete or needs adjustments. Sometimes that one area you've been fussing over doesn't actually need more work.
Ask yourself these questions: Does the painting have a focal point or area of interest? Is there enough contrast? Does your eye move around the composition comfortably? If you can answer yes to these, you might be done.
Remember, done is better than perfect. You'll learn more from finishing ten imperfect paintings than from endlessly working on one piece.
Learning From the Masters of Abstract Art
Looking at how established artists approach How to Paint Abstract Art for Beginners Step-by-Step provides valuable insight. Wassily Kandinsky believed abstract art could express spiritual truths through color and form. His work often features floating geometric shapes and vibrant color combinations.
Mark Rothko created massive color field paintings with soft, blurred edges. His approach was all about emotion and the relationship between colors. Joan Mitchell's gestural, energetic brushwork captured feelings and memories of landscapes without depicting them literally.
Study these artists not to copy them but to understand their thinking. What techniques did they use? How did they create movement or stillness? What emotions do their paintings evoke? Then take those insights and make them your own.
Common Mistakes and How to Avoid Them
Overworking is mistake number one. When you've been staring at a painting for hours, it's easy to keep adding "just one more thing." That's usually when you ruin something that was actually pretty good. Set a timer if you need to and force yourself to take breaks.
Using too many colors creates visual chaos. Unless chaotic is specifically what you're going for, restraint often produces stronger results. Stick to a limited palette, at least while you're learning.
Being afraid of bold moves keeps your work timid. Go bigger, darker, brighter than feels comfortable. You can always tone things down, but it's harder to add drama later. Take risks, because the worst-case scenario is you paint over it and try again.
Comparing your work to others kills creativity. Every artist started as a beginner. That stunning piece you saw online? The artist probably has years of practice and a dozen failed attempts behind them. Focus on your own growth.
Developing Your Unique Abstract Style
Your style emerges through practice and experimentation. Try different techniques, color combinations, and compositions. Notice what excites you and what feels like a chore. The stuff that lights you up? Do more of that.
Keep an inspiration folder. Screenshot images, colors, or compositions that catch your eye. These aren't for copying but for understanding what appeals to you visually. Patterns will emerge over time.
Don't force it. Trying too hard to develop a signature style usually backfires. Just keep creating, and your natural preferences and tendencies will reveal themselves. Authenticity comes from honest exploration, not imitation.
Protecting and Displaying Your Finished Work
Once your masterpiece is dry (give acrylics at least 24 hours), it needs protection. Varnish seals the surface, protects it from dust and UV damage, and can add a glossy or matte finish. Apply it in thin, even coats with a wide, soft brush.
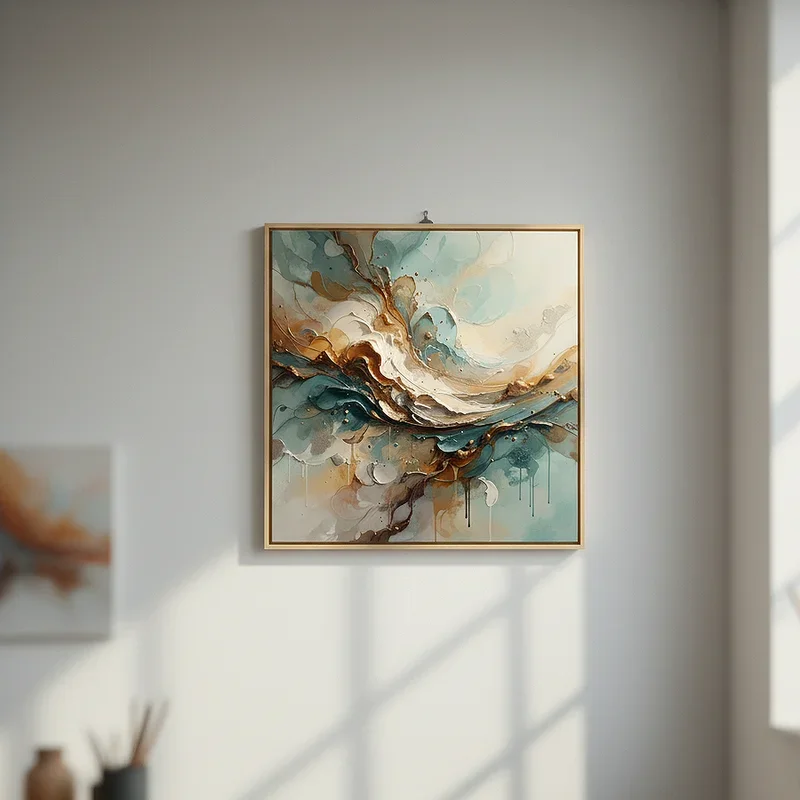
Framing isn't always necessary for canvas paintings. Many abstract pieces look great as-is, with the painted edges creating a more casual, contemporary feel. If you do frame, choose something simple that complements without competing with your art.
Display your work where you'll see it. Don't hide your creations in a closet out of misplaced modesty. Hang them on your walls, give them as gifts, or even sell them if you're feeling ambitious. Your art deserves to be seen.
Continuing Your Abstract Art Journey
How to Paint Abstract Art for Beginners Step-by-Step is just the beginning. The more you paint, the more confident and experimental you'll become. Set aside regular time for creating, even if it's just an hour a week. Consistency beats occasional marathon sessions.
Take classes or workshops if they're available. Learning alongside other artists provides community, feedback, and new perspectives. Online tutorials and courses offer flexibility if in-person options don't work for you.
Challenge yourself periodically. Try a new technique, work with unfamiliar colors, or create a series around a theme. Growth happens outside your comfort zone, so push those boundaries intentionally.
Most importantly, remember that creating abstract art should be enjoyable. Yes, it's sometimes frustrating when things don't turn out as envisioned, but that's part of the process. Embrace the mess, celebrate the happy accidents, and keep painting.
Conclusion
Abstract painting offers an accessible, rewarding creative outlet for beginners willing to experiment and take risks. By gathering basic materials, understanding fundamental techniques, and letting go of perfectionism, you can create meaningful artwork that expresses your unique perspective. Remember that every professional artist started exactly where you are now. The difference is simply that they kept going. So grab those brushes, silence your inner critic, and start painting.
Read next: 15 Abstract Painting Ideas to Spark Your Creativity
Frequently Asked Questions
Q1: What type of paint works best for abstract art beginners?
A: Acrylics are ideal because they dry quickly, clean easily, and are affordable.
Q2: Do I need expensive brushes to start painting abstract art?
A: No, inexpensive synthetic brushes work perfectly fine when you are just beginning your journey.
Q3: How long should I let acrylic paint dry between layers?
A: Wait at least 30 minutes to an hour for thin layers, longer for thick applications.
Q4: Can I create abstract art without any previous painting experience?
A: Absolutely, abstract art is perfect for beginners because there are no strict rules.
Q5: What size canvas should beginners start with for abstract painting?
A: A 16x20 inch canvas provides enough space without feeling overwhelming for new artists.
Stay up to date with our latest ideas!