How to Draw 3D Art: Simple Techniques for Beginners
Learn how to draw 3D art with simple beginner techniques. Master depth, shading, and perspective to create stunning illusions on paper.
Ever looked at one of those mind-bending drawings where a hole seems to open up right in the middle of the page, and thought to yourself, "How on earth did they do that?" You're definitely not alone! 3D art has this almost magical quality that makes people stop in their tracks and do a double take. And here's the really exciting part: it's way more achievable than most folks realize.
The truth is, creating artwork that appears to leap off the page or sink into impossible depths doesn't require some kind of supernatural talent. What it does require is understanding a few fundamental principles and putting in some good old-fashioned practice. Once those concepts click into place, you'll be absolutely amazed at what your pencil can accomplish.
This How to Draw 3D Art: Simple Techniques for Beginners guide will take you from flat, lifeless sketches to drawings that practically pop right off your sketchbook. We're going to explore everything from basic perspective tricks to shading secrets that professional artists use every single day. Whether you want to create optical illusions that fool the eye or simply add more depth and realism to your regular artwork, you've come to the right place.
So grab your pencils, find a comfy spot, and let's embark on this journey into the third dimension together! Trust me, by the time we're done here, you'll be seeing your paper in a whole new way.
What Makes Art Look Three-Dimensional?
Before we jump into the actual drawing techniques, it's worth taking a moment to understand what's really happening when a flat image tricks our brains into seeing depth. After all, your paper is completely flat, yet somehow we can make it appear to have holes, bumps, and objects floating above it. Pretty wild when you think about it, right?
Our eyes and brains work together to interpret the world around us, and they rely on certain visual cues to determine depth and distance. When artists recreate these same cues on a flat surface, our brains can't help but interpret the image as three-dimensional. It's like speaking a secret language that your viewer's mind automatically understands.
The main elements that create this illusion include perspective, shading, shadows, and foreshortening. Each of these tools manipulates how we perceive space and form. Master them individually, combine them skillfully, and suddenly your drawings will have a presence that flat artwork simply can't achieve.
The Psychology Behind the Illusion
Here's something fascinating to consider. Your brain actually wants to see things in three dimensions because that's how it's wired to interpret the real world. When you provide enough visual information suggesting depth, your mind fills in the gaps automatically. Artists have been exploiting this quirk of human perception for centuries, and now you get to join their ranks!
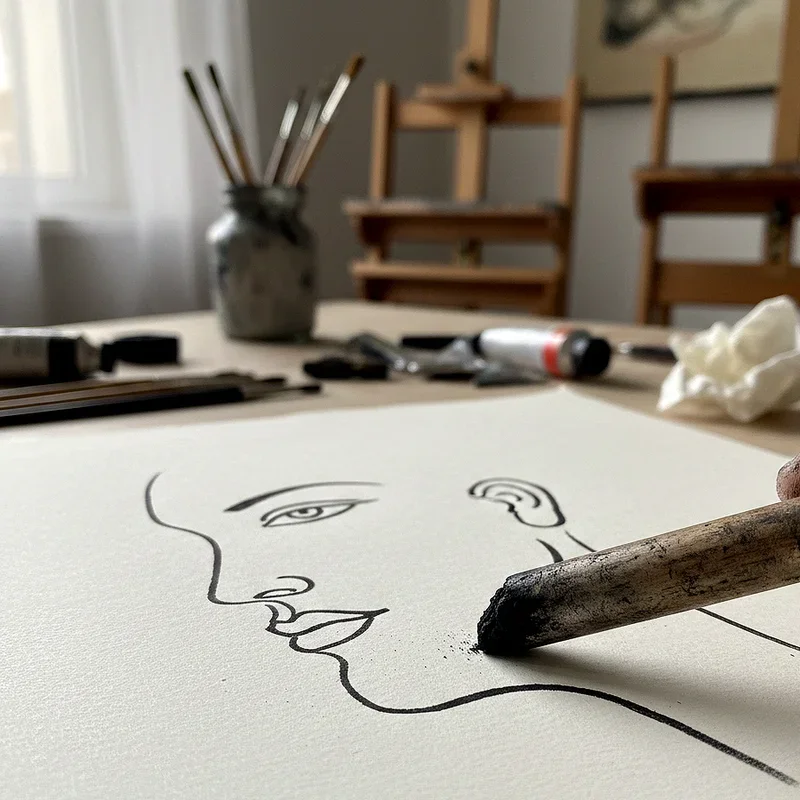
Essential Supplies for Getting Started
Good news! You don't need a fancy art store shopping spree to begin creating 3D artwork. In fact, keeping your supplies simple at first lets you focus on developing your skills without getting distracted by too many options.
A set of graphite pencils ranging from 2H to 6B will cover most of your needs. The harder pencils (H grades) create lighter lines perfect for construction sketches, while softer pencils (B grades) deliver those rich, dark tones essential for convincing shadows.
Smooth drawing paper works best for 3D illusion art because it allows for seamless gradients and precise lines. Bristol board is fantastic for finished pieces, though regular printer paper honestly works just fine when you're practicing.
A good quality eraser becomes incredibly important for 3D work. You'll use it not just for fixing mistakes but also as a drawing tool itself, lifting graphite to create highlights and refine edges. Kneaded erasers are particularly useful since you can shape them for detailed work.
Optional but helpful additions include a blending stump for smooth shading, a ruler for perspective lines, and a compass for perfect circles. As you progress, you might explore colored pencils or markers, but mastering graphite first gives you a solid foundation.
How to Draw 3D Art: Simple Techniques for Beginners Explained
Alright, let's get down to brass tacks! This section covers the core techniques that'll transform your flat drawings into dimensional masterpieces. Take your time with each concept because they all build upon one another.
Understanding One-Point Perspective
One-point perspective is probably the friendliest place to start your 3D journey. It's called "one-point" because all lines that go back into the distance converge at a single point on the horizon, known as the vanishing point.
Imagine standing in the middle of a long, straight road. The edges of that road appear to get closer together as they stretch toward the horizon until they eventually seem to meet at a single dot. That dot is your vanishing point, and understanding this concept unlocks a whole world of possibilities.
To practice, draw a horizontal line across your paper representing the horizon. Place a dot somewhere on that line. Now draw a square or rectangle below the horizon line. From each corner of that shape, draw light lines extending back to your vanishing point. Connect these lines with vertical and horizontal edges, and boom! You've created a three-dimensional box.
Playing around with where you position your vanishing point dramatically changes the feel of your drawing. A centered vanishing point creates a balanced, symmetrical look, while placing it off to one side generates more dynamic, interesting compositions.
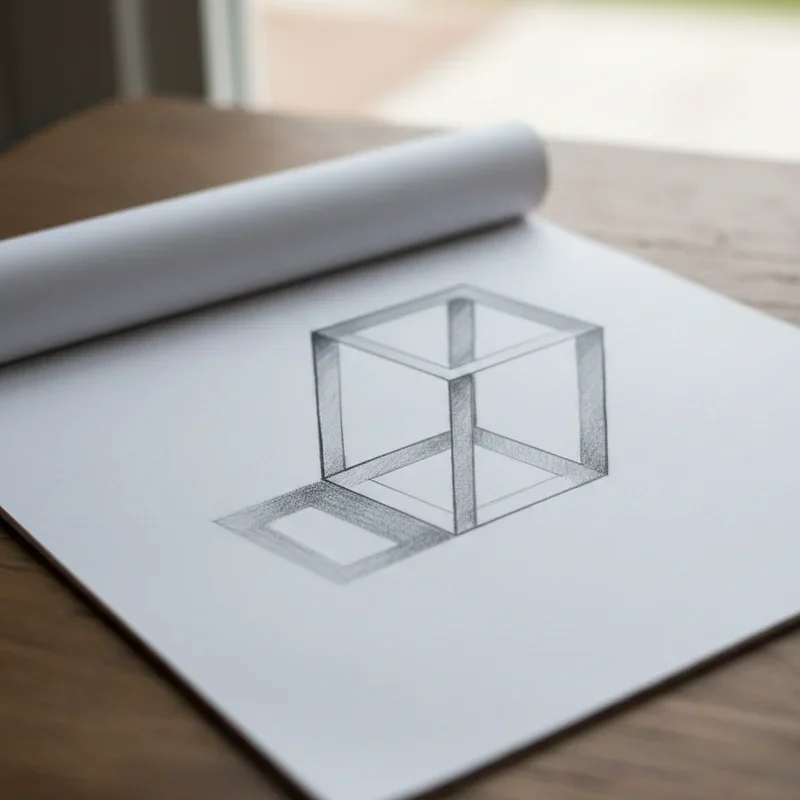
Mastering Two-Point Perspective
Once you've gotten comfortable with one-point perspective, adding a second vanishing point opens up even more realistic possibilities. Two-point perspective is what you see when looking at the corner of a building rather than straight at its face.
For this technique, place two vanishing points on your horizon line, spacing them fairly far apart. Start by drawing a vertical line somewhere between these points. This line represents the nearest edge of your object, like the corner of a box.
From the top and bottom of your vertical line, draw lines extending to both vanishing points. These lines form the top and bottom edges of two sides of your box. Add vertical lines to close off the sides, and you've created a convincing three-dimensional form viewed from an angle.
The key here is keeping those vanishing points far enough apart. If they're too close together, your object will look distorted and weird, almost like it's melting. Give them room to breathe!
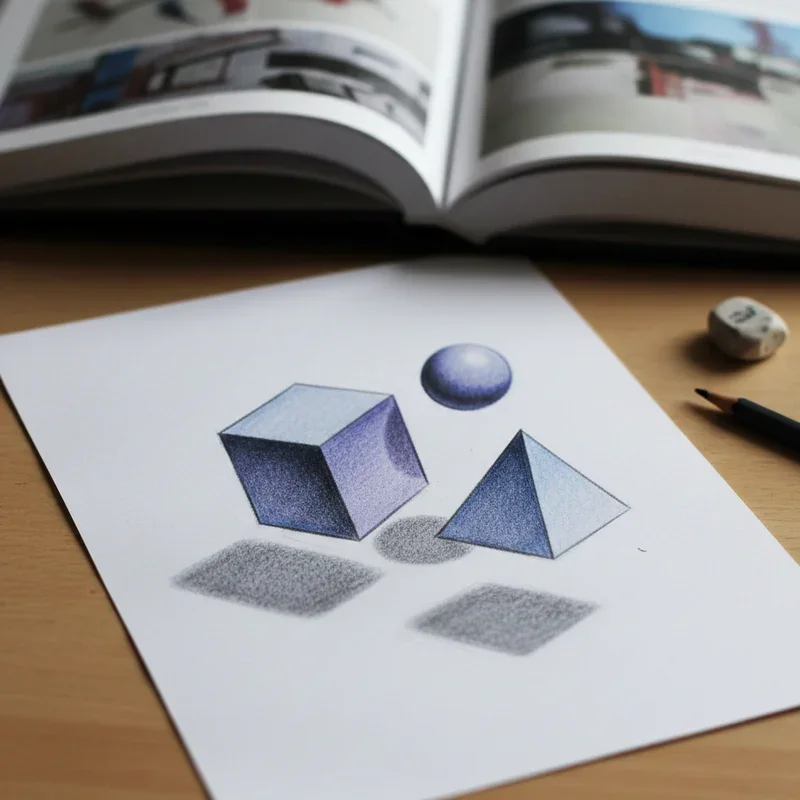
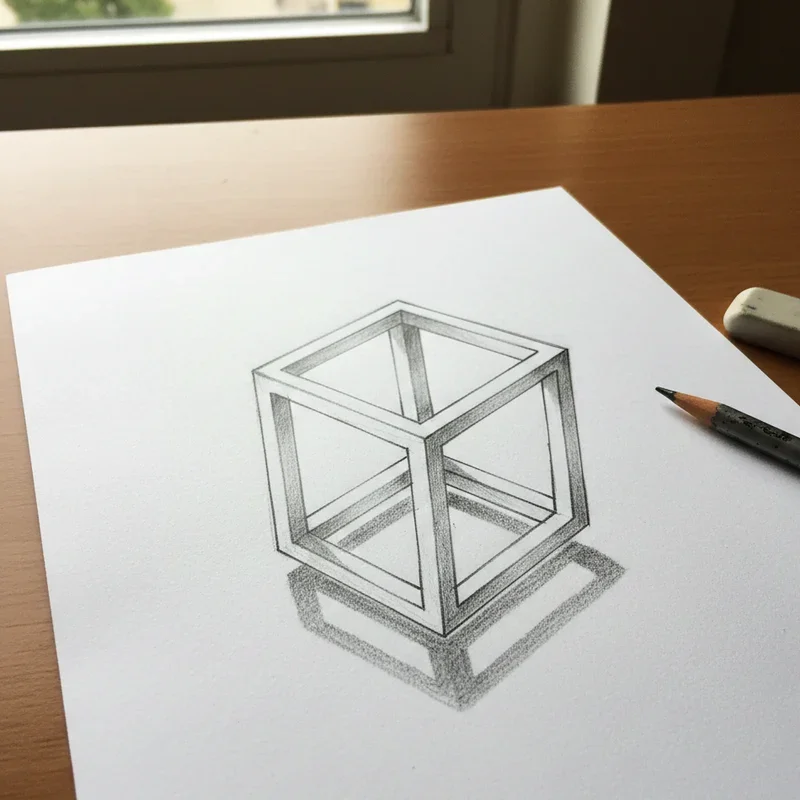
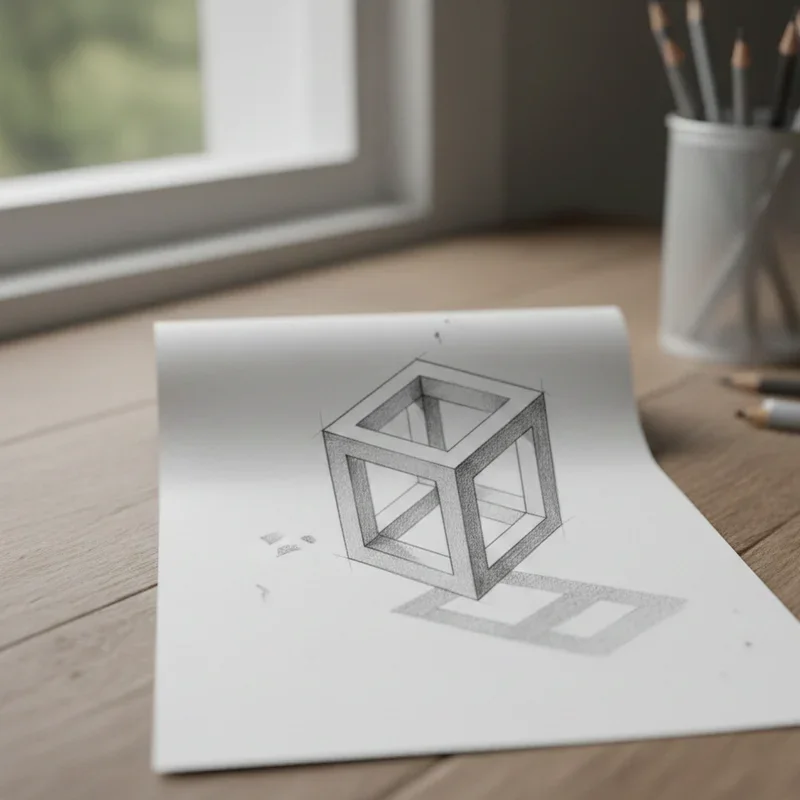
The Magic of Shading and Value
Perspective gets your shapes right, but shading is what really sells the illusion. Without proper shading, even perfectly drawn perspective looks flat and unconvincing. With it, simple shapes suddenly gain weight, volume, and presence.
Think about how light behaves in the real world. When light hits an object, the surface facing the light source appears brightest. As surfaces curve or angle away from the light, they gradually get darker. The area completely blocked from light, the shadow, appears darkest of all.
Start practicing by drawing a simple sphere. Decide where your light source is located, then shade accordingly. The area closest to the light stays white or very light. Moving away from the light, gradually build up darker tones using the side of your pencil. Blend these transitions smoothly for a realistic effect.
Don't forget the cast shadow! This is the shadow your object throws onto the surface it's sitting on. Cast shadows anchor objects to their environment and prevent them from looking like they're floating in space.
Creating Convincing Drop Shadows
Speaking of shadows, mastering the drop shadow technique specifically will serve you incredibly well in 3D art. A well-executed drop shadow can make letters, shapes, or objects appear to hover above the paper surface.
The trick lies in understanding that shadows fall away from the light source and become softer and more diffused as they get farther from the object casting them. A shadow directly beneath an object appears darker and sharper, while the edges farther away become lighter and fuzzier.
For floating objects, position your shadow slightly offset from the object based on your imaginary light direction. The greater the gap between object and shadow, the higher the object appears to float. Keeping them close together suggests the object is barely lifted off the surface.
Step-by-Step Exercises to Build Your Skills
Theory is great and all, but nothing beats hands-on practice! Here are some exercises that'll help cement these concepts in your artistic toolbox.
Drawing a 3D Hole in Paper
This classic illusion never fails to impress, and it's surprisingly straightforward once you know the secret.
Start by drawing an oval shape on your paper. This will become the opening of your hole. Make the oval wider than it is tall for the most convincing effect.
Inside the oval, draw curved lines that follow its shape, getting progressively smaller as they go down. These represent the circular ridges inside your hole. Space them closer together as they descend to enhance the illusion of depth.
Shade the inside of the hole, making it progressively darker toward the bottom. The deepest part should be nearly black. Add subtle shading around the outer edge of the top oval to suggest the paper curving down into the hole.
For extra impact, draw a shadow on one side of the hole as if the raised edge is casting it onto the "inside" surface.
Creating Floating 3D Letters
Three-dimensional letters make fantastic practice projects because they combine perspective with shading in a manageable way.
Write a letter in block form on your paper. Choose something with straight lines like an E, F, or L when you're starting out since curves add complexity.
Pick a consistent direction for your depth, typically going down and to the right or left. From every corner and edge of your letter, draw parallel lines extending in that direction. Keep them the same length for uniform depth.
Connect the ends of these lines to create the sides and back of your letter. Erase any lines that would be hidden from view. Finally, shade the recessed surfaces darker than the front face, and add a cast shadow beneath the whole thing.
Sketching a 3D Staircase
Staircases offer wonderful perspective practice while creating an instantly recognizable illusion.
Using one-point perspective, establish your horizon line and vanishing point. Draw the front face of your first step as a rectangle. Then draw lines from its top corners back to the vanishing point.
Build subsequent steps by drawing horizontal lines at regular intervals along those receding lines, then adding vertical risers. Each step should appear to get smaller as it recedes into the distance.
Shade the vertical risers darker than the horizontal treads to clearly distinguish between surfaces. Add cast shadows from each step onto the one below for extra realism.
Common Pitfalls and How to Dodge Them
Everyone makes mistakes when learning something new, and 3D drawing is no exception. Knowing what to watch out for can save you loads of frustration.
Inconsistent light direction confuses the eye and destroys the illusion instantly. Pick one light source direction and stick with it throughout your entire drawing. Everything should be lit from the same angle.
Rushing your shading produces blotchy, unconvincing results. Building up tones gradually with multiple light layers creates much smoother, more realistic gradients than pressing hard and trying to get dark values immediately.
Ignoring proportions as objects recede makes drawings look wonky. Objects farther away should consistently appear smaller than closer ones of the same actual size.
Taking Your How to Draw 3D Art: Simple Techniques for Beginners Skills Further
Once these fundamentals feel comfortable, the possibilities really open up! You might explore anamorphic art, which creates illusions that only work from specific viewing angles. Or perhaps photorealistic 3D drawing appeals to you, combining everything you've learned with careful observation of real-world references.
Digital tools offer another exciting avenue, with software specifically designed for creating 3D effects. However, the traditional pencil skills you're developing now translate beautifully to any medium you might explore later.
Conclusion
Creating 3D art that jumps off the page is genuinely within your reach once you understand perspective, master shading techniques, and practice consistently. Remember that every amazing 3D artist started exactly where you are now, staring at flat paper and wondering how to make magic happen. Keep experimenting, embrace your mistakes as learning opportunities, and watch your drawings transform from flat sketches into dimensional wonders that captivate everyone who sees them!
Read next: 15 Flower Drawing Ideas That Are Easy and Beautiful
Frequently Asked Questions
1. What's the easiest 3D drawing technique for complete beginners to learn?
One-point perspective with simple geometric shapes provides the most accessible starting point for newcomers.
2. How long does it take to get good at drawing 3D art?
With consistent daily practice, most beginners see noticeable improvement within four to six weeks.
3. Can I create 3D drawings using only regular pencils and paper?
Absolutely! Basic graphite pencils and standard paper work perfectly fine for stunning 3D artwork.
4. Why do my 3D drawings still look flat despite following techniques?
Usually insufficient contrast between light and shadow areas prevents the illusion from working properly.
5. Should I learn to draw realistically before attempting 3D art?
Not necessarily! 3D techniques can actually help develop your overall drawing skills simultaneously.
Stay up to date with our latest ideas!