How to Make a Rose Drawing Step by Step for Beginners
Learn how to draw a rose easily with this beginner-friendly step by step guide covering shapes, petals, shading, and finishing details.

Roses have this magical pull, don't they? They show up in poems, tattoos, wedding bouquets, and countless sketchbooks for good reason. Drawing one might seem like climbing Everest if you've never tried, but honestly, it's way more approachable than folks make it out to be. The trick lies in breaking down what looks complicated into bite-sized chunks anyone can handle. This How to Make a Rose Drawing Step by Step for Beginners walks you through every twist and turn, from your first wobbly circle to that final shaded petal. Grab a pencil, take a breath, and let's turn that blank page into something you'll actually want to show off.
Why Roses Are the Perfect First Flower to Draw
You might wonder why we're starting with roses instead of, say, daisies or tulips. Fair question. Roses teach you so much in a single drawing because they pack curves, layers, depth, and texture into one beautiful package. Once you get comfortable rendering rose petals, drawing other flowers feels easier almost automatically. Plus, roses come in countless varieties, meaning your drawing doesn't have to look picture-perfect to feel right. A slightly imperfect rose still looks like a rose, which gives beginners breathing room to learn without feeling crushed by mistakes. That forgiveness factor matters more than you'd think.
Gathering the Right Tools Before You Begin
Hold up before diving in. Having the right gear genuinely changes the experience. You don't need a fancy art store haul, but a few basics make life easier. Here's what'll serve you well:
A medium-soft graphite pencil, typically HB or 2B, for sketching outlines.
A softer pencil like 4B or 6B for shading darker areas.
A kneaded eraser, which lifts graphite without smudging the paper.
A regular vinyl eraser for cleaner removal jobs.
Smooth drawing paper, around 70 to 100 gsm, that handles erasing without tearing.
A blending stump or even a tightly rolled tissue for smoothing out shading.
That's really all you need to start. Skip the temptation to buy every supply under the sun. Learn with simple tools first, then upgrade once you know what you actually like.
Setting Up Your Workspace for Success
Lighting matters more than beginners realize. Set up near a window during daylight hours or grab a desk lamp positioned to your non-dominant side, preventing your hand from casting shadows on the paper. Sit comfortably with both feet flat, and keep your back relaxed because tension creeps into your lines without you noticing. Have a reference image nearby, whether that's a real rose, a photograph, or even a stock image on your phone. Drawing from references isn't cheating, it's how artists at every level learn to see properly. Trust me, your future drawings will thank you.
How to Make a Rose Drawing Step by Step for Beginners: Starting With Basic Shapes
Okay, here's where the magic begins, and it starts surprisingly simple. Forget trying to draw a rose right out of the gate. Instead, sketch a small circle near the center of where you want your bloom to sit. This little circle represents the tightly furled center of the rose. Around that circle, lightly draw a larger oval or rounded shape that establishes the overall outline of your flower. Keep these initial lines feather-light because you'll erase plenty of them later. Think of these shapes as scaffolding holding up the building before the real construction starts.
Building the Inner Spiral That Anchors Everything
The heart of any rose drawing lives in that central spiral. Inside your small circle, draw a curved line that resembles a backward C or a tight comma shape. This curve represents the innermost petal, the one wrapped tightest around the bud. Now add another similar curve right next to it, slightly offset and overlapping. Keep building outward with these gentle, curving lines, each one peeking out from behind the previous. Don't worry if it looks strange at first. Roses naturally have this layered, almost chaotic order that somehow always looks beautiful when finished.
Adding Outer Petals That Open Outward
Once your inner spiral has three or four small overlapping curves, it's time to expand. The outer petals open up and away from the center, almost like the rose is taking a deep breath. Draw petals that curve outward, with their tips pointing slightly downward. Each petal should overlap its neighbor, creating that classic rose layering effect. Vary the size and shape slightly because uniform petals look fake. Some petals might be wider, others narrower, and a few might curl back at the edges. This irregularity is what makes your drawing feel alive rather than mechanical.
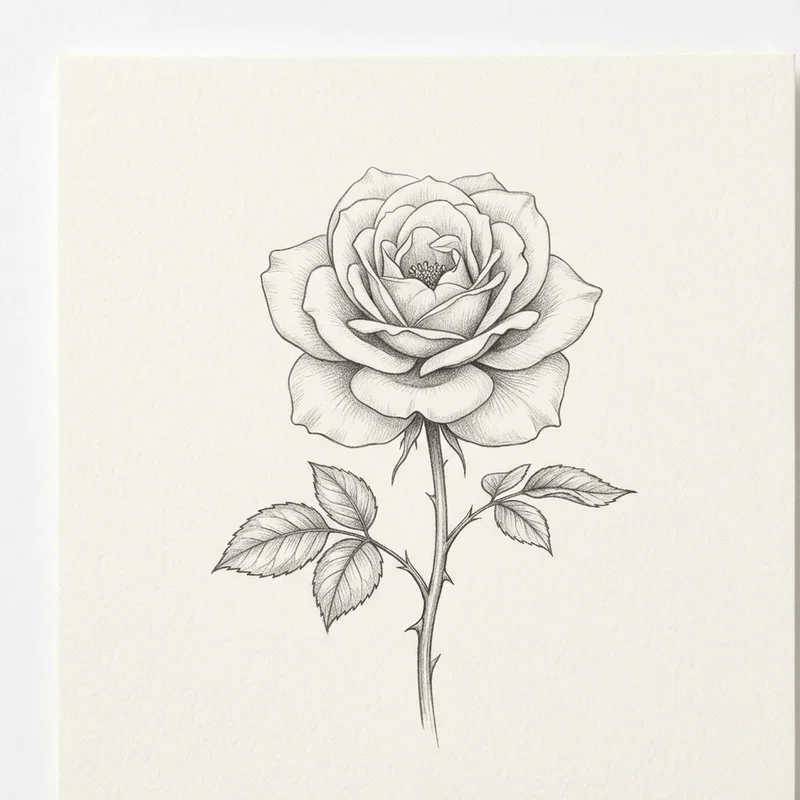
Refining Petal Edges for Realism
Now's a good moment to revisit those petal edges and add a touch of personality. Real rose petals aren't perfectly smooth. They often have slight waves, gentle curves, and occasional small dips along the edges. Lightly redraw your petal outlines with these subtle imperfections. A slight ripple here, a soft fold there, makes a huge difference. Erase any harsh original lines that no longer fit the refined version. Take your time with this stage because it's where your rose transitions from looking like a cartoon to feeling like a genuine bloom captured on paper.
Drawing the Stem and Leaves Below
A rose without a stem feels incomplete, doesn't it? Below your bloom, draw two roughly parallel curved lines representing the stem. The stem doesn't need to be perfectly straight, in fact, a slight curve adds natural elegance. From the stem, sketch a few leaves branching outward. Rose leaves typically have a serrated, almost saw-toothed edge, with a clear central vein running down the middle. Don't go overboard with leaves, two or three usually does the trick. Keep things proportional, meaning the stem and leaves shouldn't dominate or disappear next to your bloom.
How to Make a Rose Drawing Step by Step for Beginners: Adding the First Layer of Shading
Shading turns a flat outline into something that pops off the page. Start by identifying where your light source comes from, usually upper left or upper right. Areas facing away from the light receive shadows, while areas facing toward it stay lighter. Begin with light, even strokes using your HB or 2B pencil. Add darker shadows where petals overlap, particularly in the deeper folds near the rose's center. Don't press hard at first because building shadows gradually gives you way more control than trying to slam down dark tones immediately. Subtlety wins this game.
Deepening Shadows for Dimensional Magic
After laying down your initial shading, switch to a softer pencil like 4B for deeper shadows. The darkest areas typically sit at the very base of each petal where it meets another petal, and within the tight inner spiral. Layer these darker tones on top of your existing shading rather than starting fresh. This creates a smooth gradient from light to dark, which fools the eye into seeing depth and roundness. Squint at your drawing occasionally to check whether your shadows feel balanced. If something looks off, your eyes usually catch it before your conscious mind does.
Smoothing Things Out With Blending
Blending gives your rose that polished, professional feel. Take your blending stump or rolled tissue and gently rub over your shaded areas in small circular motions. This softens harsh pencil strokes, creating that smooth gradient real petals have. Be careful not to over-blend because losing too much definition flattens the entire drawing. Some texture should remain visible, especially along petal edges where light catches. Think of blending as seasoning food. A pinch enhances the dish, but dumping in the whole jar ruins everything. Less is genuinely more here.
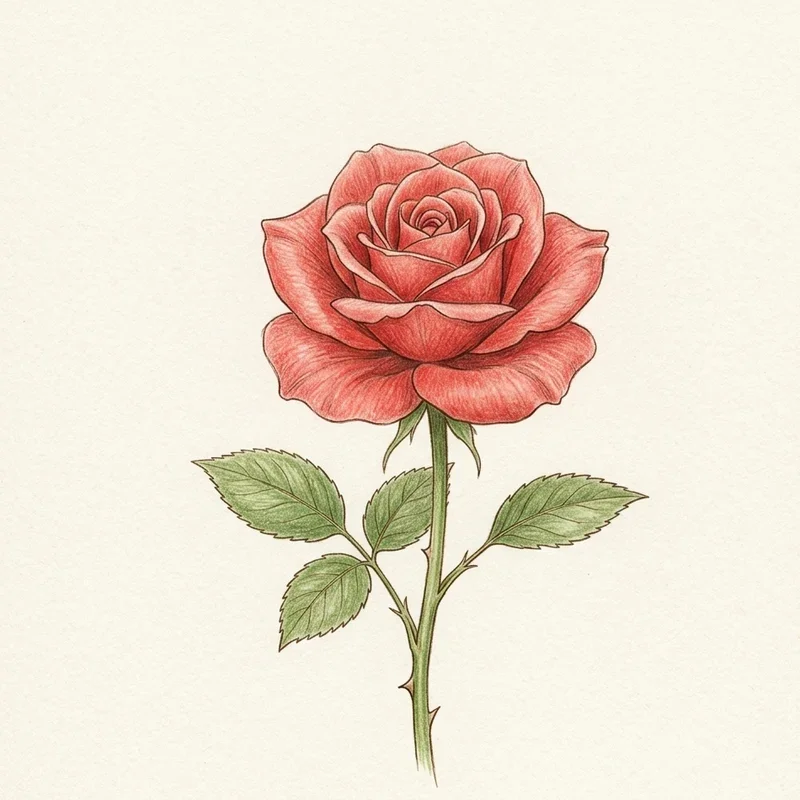
Adding Highlights That Bring the Rose to Life
Here's a sneaky little trick that elevates beginner drawings dramatically. Use your kneaded eraser to gently lift graphite from areas that should appear lit. Press lightly, dabbing rather than rubbing. These lifted highlights create the illusion of light bouncing off petal surfaces, instantly adding realism. Focus highlights along the upper edges of petals facing your light source. Don't go overboard, since too many highlights make things look chalky. A few well-placed lifted spots transform a decent drawing into something genuinely impressive. This contrast between light and shadow is what makes art feel three-dimensional.
Detailing the Stem and Leaves
Don't neglect the supporting cast. Your stem deserves some shading too, with darker tones along one side and lighter values on the other. Add tiny thorns scattered along the stem, drawn as small triangular shapes. For the leaves, sketch a central vein and a few smaller branching veins extending outward. Shade leaves with darker tones along the veins and edges, leaving the central areas lighter. This contrast makes leaves feel three-dimensional rather than flat. Even though the bloom takes center stage, well-detailed stems and leaves complete the composition and prevent the rose from looking awkwardly disconnected.
Common Beginner Mistakes Worth Dodging
Everyone stumbles when learning, but knowing common pitfalls helps you sidestep them. Here are some traps to watch out for:
Pressing way too hard on initial sketch lines, making erasing nearly impossible.
Trying to draw every petal perfectly instead of embracing slight imperfections.
Skipping the basic shapes stage and jumping straight to detailed petals.
Forgetting to establish a clear light source before shading.
Over-blending shadows until the drawing looks muddy and lifeless.
Comparing your first attempts to professional artwork instead of your own progress.
Recognizing these mistakes saves you tons of frustration. Every artist faces them, and pushing through builds the skills that distinguish casual doodlers from genuinely talented illustrators.
How to Make a Rose Drawing Step by Step for Beginners: Practicing Different Angles
Once you've nailed a basic front-facing rose, try mixing things up. Side-view roses show off the bud's profile, while three-quarter angles reveal both the spiral interior and the outer petal layers. Drawing roses from different perspectives stretches your skills and prevents your work from feeling repetitive. Keep a small sketchbook just for rose practice, dedicating a few minutes daily to quick studies. You'll be amazed at how much progress sneaks up on you within just a couple of weeks. Consistency beats marathon sessions every single time when learning to draw.
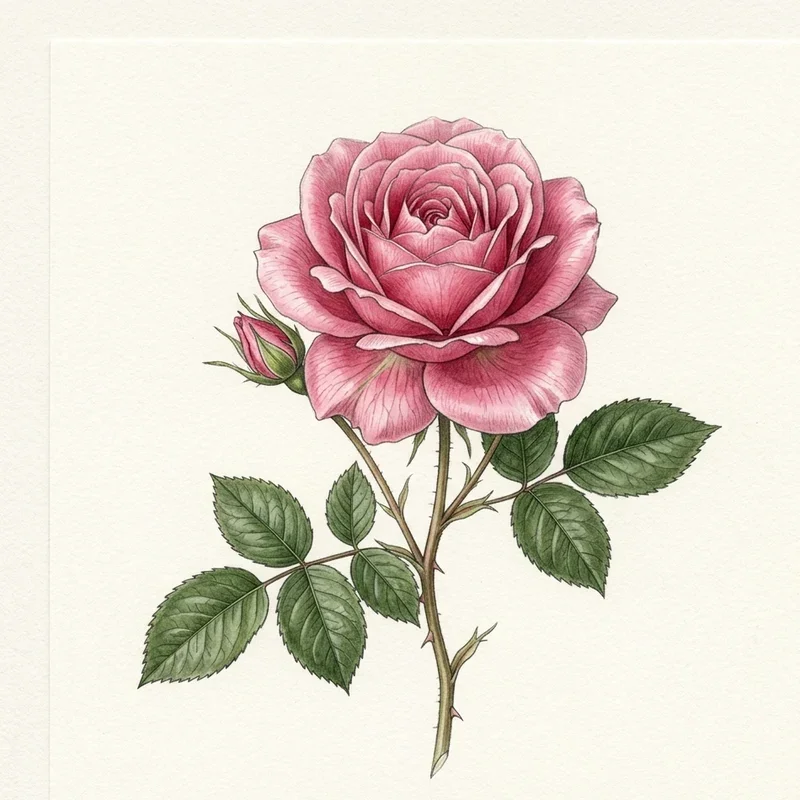
Adding Color Once You're Ready
While pencil drawings have classic charm, eventually you might crave color. Colored pencils, watercolors, or markers each bring different vibes. Colored pencils blend beautifully and forgive mistakes, making them ideal for beginners exploring color. Start with traditional rose colors like reds, pinks, and yellows before experimenting with unusual hues like blue or black. Apply color gradually in thin layers, building intensity slowly. The same shading principles apply, with darker tones in shadows and lighter tones in highlighted areas. Don't feel pressured to add color before you're ready. Plenty of stunning rose drawings live happily in grayscale forever.
Building Confidence Through Repetition
Truthfully, no one nails a rose on their first try. Or their tenth. Drawing improves through repetition, not magic. Treat each rose as practice rather than a masterpiece. Keep your old drawings even when they look rough because flipping back through them weeks later reveals progress you can't see day-to-day. Share your work with supportive friends, online art communities, or family members who'll cheer you on. Honest feedback combined with encouragement fuels growth. Drawing should feel enjoyable, not stressful, so let go of perfectionism and celebrate the journey instead of obsessing over flawless results.
Conclusion
Drawing a rose really does come down to patience, observation, and willingness to make mistakes along the way. Start with simple shapes, build your spiral, layer those petals, add thoughtful shading, and finish with strategic highlights. Every rose you sketch teaches you something new, even when it doesn't turn out exactly how you imagined. With practice and a little curiosity, you'll be cranking out beautiful blooms before you know it. Keep your pencil moving, trust the process, and watch your skills bloom right alongside your drawings.
Read next: 15 Cute Easy Painting Ideas That Look Adorable
Frequently Asked Questions
1. How long does it take beginners to draw a decent rose?
Most beginners can complete a recognizable rose drawing within thirty to sixty minutes of focused practice.
2. Do I need expensive art supplies to draw roses well?
No, a basic pencil, eraser, and decent paper are more than enough for beginners.
3. Can I draw a rose without using a reference image?
Reference images help tremendously, but freehand drawing is fine once you understand basic rose anatomy.
4. Why does my rose drawing look flat instead of three-dimensional?
Flat appearance usually means insufficient shading contrast or missing highlights along upper petal edges.
5. Should I trace roses to learn drawing them faster?
Tracing helps initially, but freehand sketching builds stronger long-term skills and observational drawing muscles.
Stay up to date with our latest ideas!