How to Make Sea Glass Art Step by Step
Learn how to make sea glass art step by step with our creative guide. Transform beach treasures into stunning home decor pieces today.

There's something truly magical about finding a piece of sea glass on the beach, isn't there? Those frosted little gems have tumbled through the ocean for decades, maybe even centuries, before washing up at your feet. Now, what if you could transform these ocean treasures into breathtaking artwork that'll have your friends asking where on earth you bought it? Well, you're in luck because creating sea glass art has become one of the most rewarding crafts around. Whether you've been collecting sea glass for years or just discovered your first piece last weekend, turning these natural beauties into art is easier than you might think. The best part is that no two creations are ever the same, making each piece uniquely yours.
Why Sea Glass Art Has Captured Hearts Everywhere
Before we jump into the nitty gritty of creating your own pieces, let's talk about why sea glass art has become such a beloved craft. Honestly, it's not hard to understand the appeal when you think about it.
Sea glass carries history within its frosted surface. Each piece started as something ordinary, perhaps a soda bottle from the 1950s or a medicine jar from a century ago. The ocean then worked its magic, tumbling and polishing these fragments until they became something extraordinary. When you create art with sea glass, you're essentially giving new life to forgotten objects while connecting with the natural world.
Additionally, sea glass art brings the tranquil essence of the beach right into your home. Those soft aqua blues, seafoam greens, and rare cobalt pieces evoke memories of sandy shores and crashing waves. It's like having a little piece of your favorite vacation spot hanging on your wall, and who wouldn't want that?
Gathering Your Sea Glass Collection
Where to Find Quality Pieces
Now, let's get down to brass tacks. Before you can create anything, you'll need to gather your materials, and finding good sea glass is half the adventure.
The best hunting grounds are typically beaches with rocky areas where glass can tumble naturally against stones. Coastal regions with historical significance, such as old ports or areas near former glass factories, often yield the most impressive finds. Early morning after a storm is generally the prime time for hunting, as the waves stir up pieces that have been resting on the ocean floor.
If you're landlocked or simply can't wait to start creating, purchasing sea glass from reputable sellers is perfectly acceptable. Many craft stores and online marketplaces offer genuine sea glass sorted by color and size. Just make sure you're buying authentic ocean tumbled pieces rather than artificially frosted glass, which lacks that genuine character.
Sorting and Preparing Your Glass
Once you've amassed a decent collection, it's time to sort through your treasures. Spread everything out on a flat surface and group pieces by color first, then by size and shape. This organization will make the creative process much smoother when you start designing.
Give your sea glass a gentle wash with mild soap and water to remove any sand or salt residue. Pat each piece dry and let them air out completely before storing. Keeping your collection in clear containers allows you to see what you have at a glance and makes selecting pieces for projects a breeze.
Essential Supplies for Your Sea Glass Projects
Basic Materials You Will Need
Getting your workspace set up properly makes the whole creative process more enjoyable. Here's what you should gather before starting any project.
You'll want a sturdy backing material such as canvas, wood panels, or thick cardboard. Glass frames with removable backs work wonderfully for creating layered pieces. Strong adhesive is crucial, and most experienced crafters swear by E6000 or clear silicone based glues for their durability and transparency.
Additional supplies include tweezers for handling small pieces, toothpicks for applying glue precisely, and a ruler or straight edge for creating clean lines. Having a variety of backgrounds available, including colored paper, fabric, or even natural materials like sand, gives you options when inspiration strikes.
Optional Tools for Advanced Projects
As your skills develop, you might want to explore some additional tools that open up new possibilities. A small rotary tool with a diamond bit allows you to drill holes in sea glass for jewelry making. Wire wrapping supplies let you create pendants and ornaments without any drilling at all.
For those interested in mixed media pieces, consider keeping shells, driftwood, and other beach finds on hand. These natural elements complement sea glass beautifully and add depth to your compositions.
How to Make Sea Glass Art Step by Step for Beginners
Starting with Simple Designs
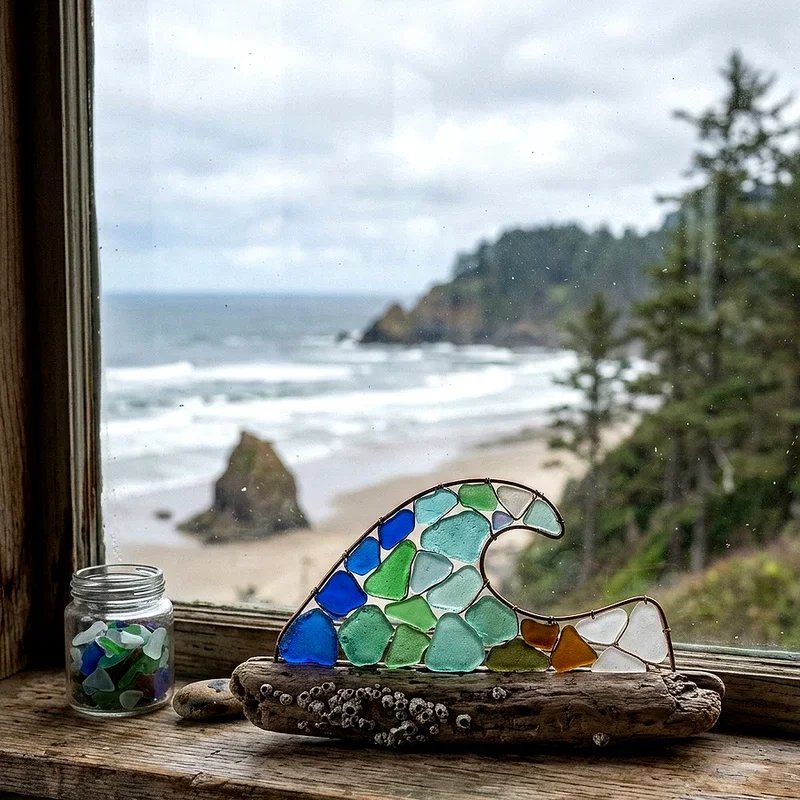
When you're just getting your feet wet, it's best to begin with straightforward projects that build confidence. A classic heart shape or simple wave pattern makes an excellent first project because the design is forgiving and the results are always charming.
Start by sketching your design lightly on your backing material. This gives you a roadmap to follow without committing to anything permanent. Lay out your sea glass pieces on the design without glue first, moving things around until you're satisfied with the arrangement. This dry fitting stage is where the real creativity happens, so take your time and experiment.
The Gluing Process Explained
Here's where patience truly becomes a virtue. Apply a small dot of adhesive to the back of each piece rather than to your backing material. This gives you better control and prevents glue from spreading where you don't want it.
Press each piece firmly into place and hold for about thirty seconds to ensure good contact. Working in sections helps maintain focus and prevents the frustration of watching carefully placed pieces shift before the glue sets. Once you've completed a section, let it dry completely before moving on.
Rushing this process is the number one mistake beginners make, so resist the temptation to speed through. Most adhesives need at least twenty four hours to cure fully, though you can gently handle your piece after a few hours.
Adding Finishing Touches
After your glue has cured, step back and evaluate your creation. Sometimes a piece needs a few additional elements to feel complete. A border of tiny pieces around the edge or a scattering of frosted white glass to fill gaps can make all the difference.
Consider whether your artwork needs any additional elements like painted details or decorative accents. Some artists add fine line drawings with permanent marker to create scenes around their sea glass, transforming simple arrangements into whimsical beach landscapes or underwater worlds.
Popular Sea Glass Art Projects to Try
Wall Art and Home Decor
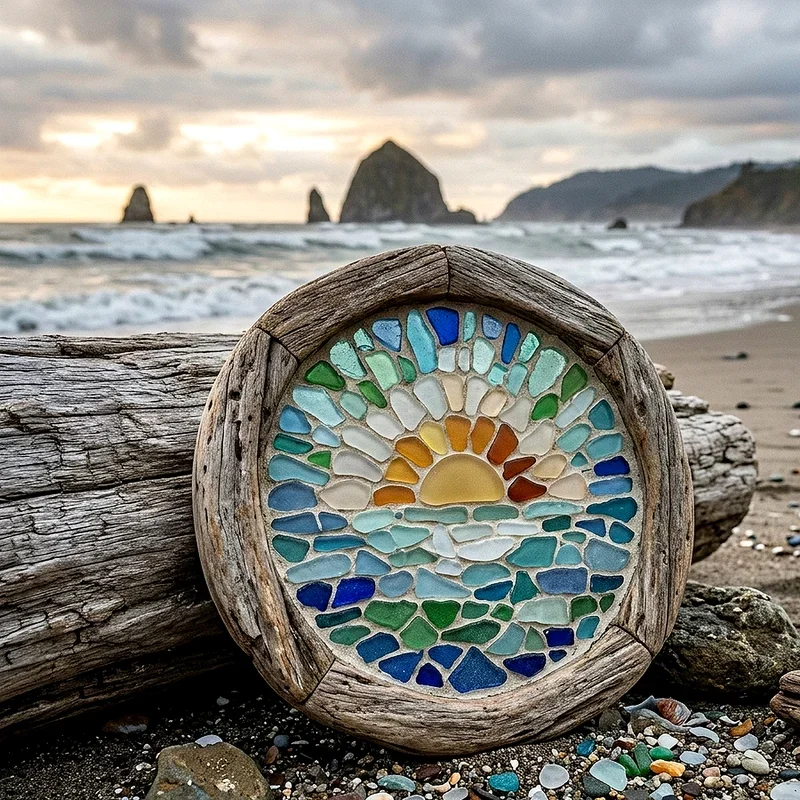
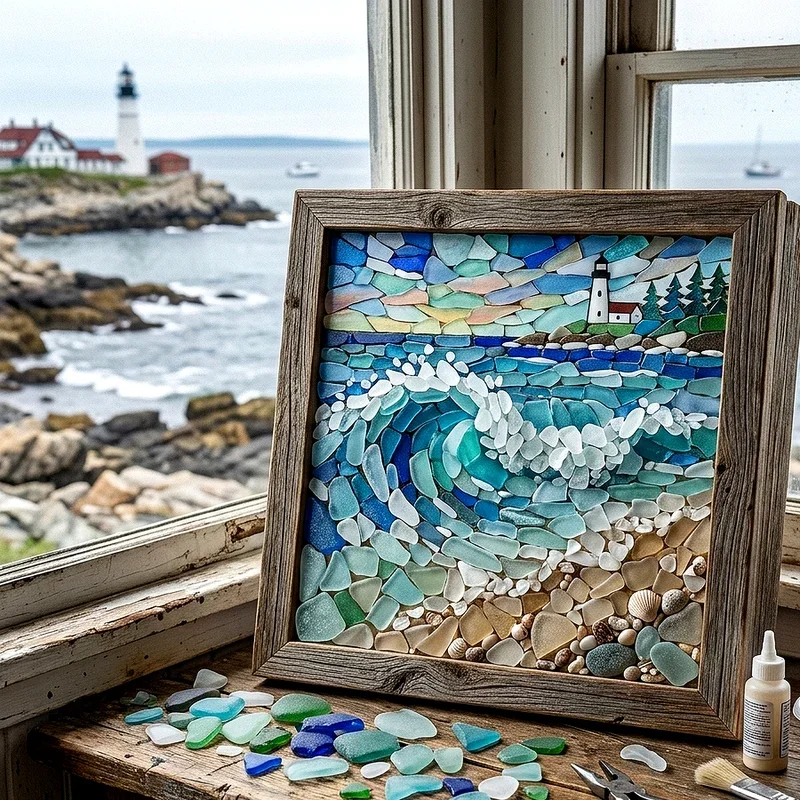
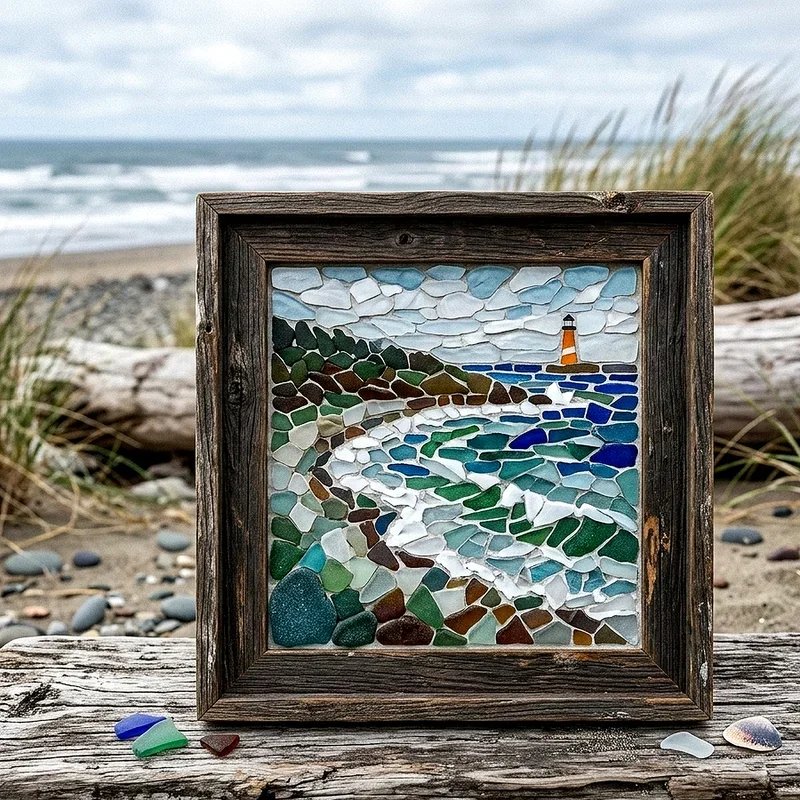
Creating framed sea glass pictures remains the most popular project type, and honestly, it's easy to see why. These pieces range from abstract color arrangements to detailed representational images like lighthouses, sailboats, or marine life.
For a stunning effect, try creating a gradient design using different shades of the same color family. Starting with pale aqua at the top and transitioning to deep teal at the bottom mimics the ocean's varying depths and creates visual interest that draws the eye.
Shadow boxes offer another dimension, quite literally, to your creations. By layering sea glass at different depths within the box, you create pieces that catch light beautifully and change appearance throughout the day as natural lighting shifts.
Functional Art Pieces
Sea glass doesn't have to sit behind glass to be appreciated. Many crafters incorporate their finds into functional items that serve a purpose while looking gorgeous.
Decorating picture frames with sea glass transforms ordinary frames into coastal themed treasures. Votive candle holders covered in translucent glass pieces create a magical glow when lit. Even furniture can get the sea glass treatment, with tabletops featuring embedded designs sealed beneath resin becoming stunning conversation starters.
Jewelry and Wearable Art
If you're looking for projects that make wonderful gifts, sea glass jewelry fits the bill perfectly. Wire wrapped pendants showcase individual pieces beautifully without requiring any specialized tools.
Simple earrings using small matched pairs of glass bring a touch of the beach to any outfit. Charm bracelets featuring multiple tiny pieces tell a story with each bead. The lovely thing about sea glass jewelry is that the natural irregularities of each piece become design features rather than flaws.
Tips from Experienced Sea Glass Artists
Working with Color
Professional sea glass artists often emphasize the importance of understanding color theory in your designs. Complementary colors, those opposite each other on the color wheel, create vibrant contrast. Analogous colors, those sitting next to each other, produce harmonious and soothing arrangements.
The rarest sea glass colors, including orange, red, and cobalt blue, deserve special treatment. Many artists save these gems for focal points in their designs, surrounding them with more common colors to make them pop.
Creating Professional Looking Results
What separates amateur work from professional pieces often comes down to attention to detail. Keeping uniform spacing between pieces creates a polished appearance. Ensuring all pieces lay flat without wobbling makes photography and display much easier.
Consider investing in quality frames and presentation materials for pieces you plan to sell or give as gifts. A beautiful frame elevates even simple designs and shows the recipient that you put thought and care into every aspect of the creation.
Displaying and Preserving Your Artwork
Choosing the Right Location
Sea glass art looks best when displayed where it can catch natural light. Near windows or in sunlit hallways allows the translucent quality of the glass to really shine. However, avoid direct harsh sunlight for extended periods, as this can potentially degrade adhesives over time.
Grouping multiple pieces together creates gallery style displays that make a strong visual impact. Mix different sizes and orientations to keep the arrangement interesting while maintaining a cohesive color palette throughout.
Long Term Care and Maintenance
Keeping your sea glass art looking fresh requires minimal effort, which is always a bonus. Occasional dusting with a soft brush removes any accumulated particles. Avoid using water or cleaning sprays directly on pieces, as moisture can weaken adhesive bonds.
If a piece does become dislodged over time, simply reattach it with fresh adhesive. This is one craft where repairs are genuinely invisible when done carefully.
Conclusion
Learning how to make sea glass art step by step opens up a world of creative possibilities that combine natural beauty with personal expression. Whether you're crafting a simple heart for your bathroom wall or designing an elaborate coastal scene for your living room, each project connects you with the ocean's transformative power. Starting with basic supplies and simple designs, you'll quickly build skills that lead to increasingly impressive creations. So gather those beach treasures, let your imagination run wild, and discover the satisfaction of turning tumbled glass into treasured artwork.
Read next: 15 Window Art Ideas to Brighten Your Home Decor
Frequently Asked Questions
Q1. How long does it take sea glass to form naturally in the ocean?
A: Natural sea glass typically takes twenty to fifty years of ocean tumbling to form properly.
Q2. Can I make my own sea glass at home for art projects?
A: Yes, you can tumble glass in a rock tumbler, though results differ from genuine sea glass.
Q3. What is the best glue to use for sea glass art projects?
A: E6000 and clear silicone adhesives work best for lasting bonds on sea glass projects.
Q4. Why is red sea glass considered so rare and valuable to collectors?
A: Red glass was historically uncommon in production, making ocean tumbled pieces extremely rare today.
Q5. How should I store my sea glass collection when not creating art?
A: Store sea glass in clear containers sorted by color and size in dry conditions.
Stay up to date with our latest ideas!